Pipedrive CRM is used by over 100,000 customers around the world and was Dux-Soup’s very first direct CRM integration.
Our Pipedrive LinkedIn integration is really simple-to-install and allows you to create and update contacts in Pipedrive from LinkedIn, and also run LinkedIn outreach campaigns directly from Pipedrive.
Connecting Pipedrive to LinkedIn with Dux-Soup enables businesses to maintain centralized prospect information, keeping your Pipedrive records up-to-date with LinkedIn messages, and data, so the full interaction history of a prospect can be seen by everyone.
This blog will walk you through the Pipedrive setup process - explaining how the integration works and how you can engage with your contacts in LinkedIn directly from Pipedrive plus create, update and enrich your CRM data with up-to-date details from LinkedIn.
You will need:
- A Dux-Soup Turbo or Cloud plan
- Pipedrive - with administrator access to set up the integration
Ready? Let's get started. We're showing you the process with the Turbo extension installed here.
First, from your Dux-Soup extension, activate "Expert Mode" under the User tab in the Options.
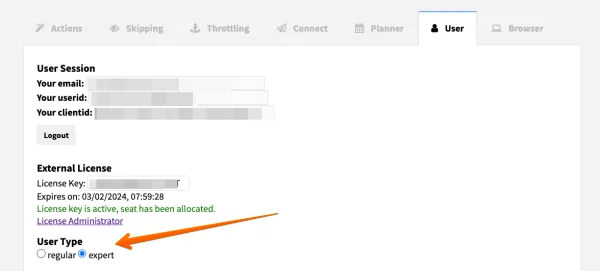
Installing the Dux-Soup Connector for Pipedrive
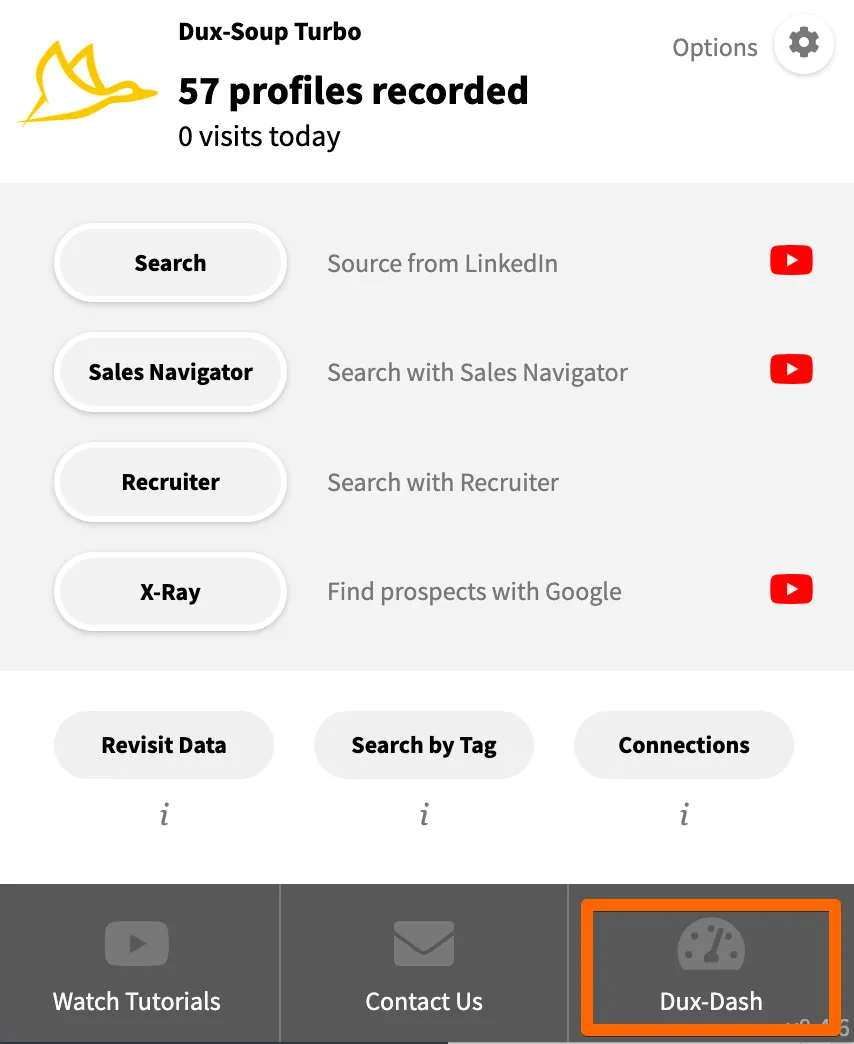
From your extension, click on the Dux-Dash at the bottom right-hand corner.
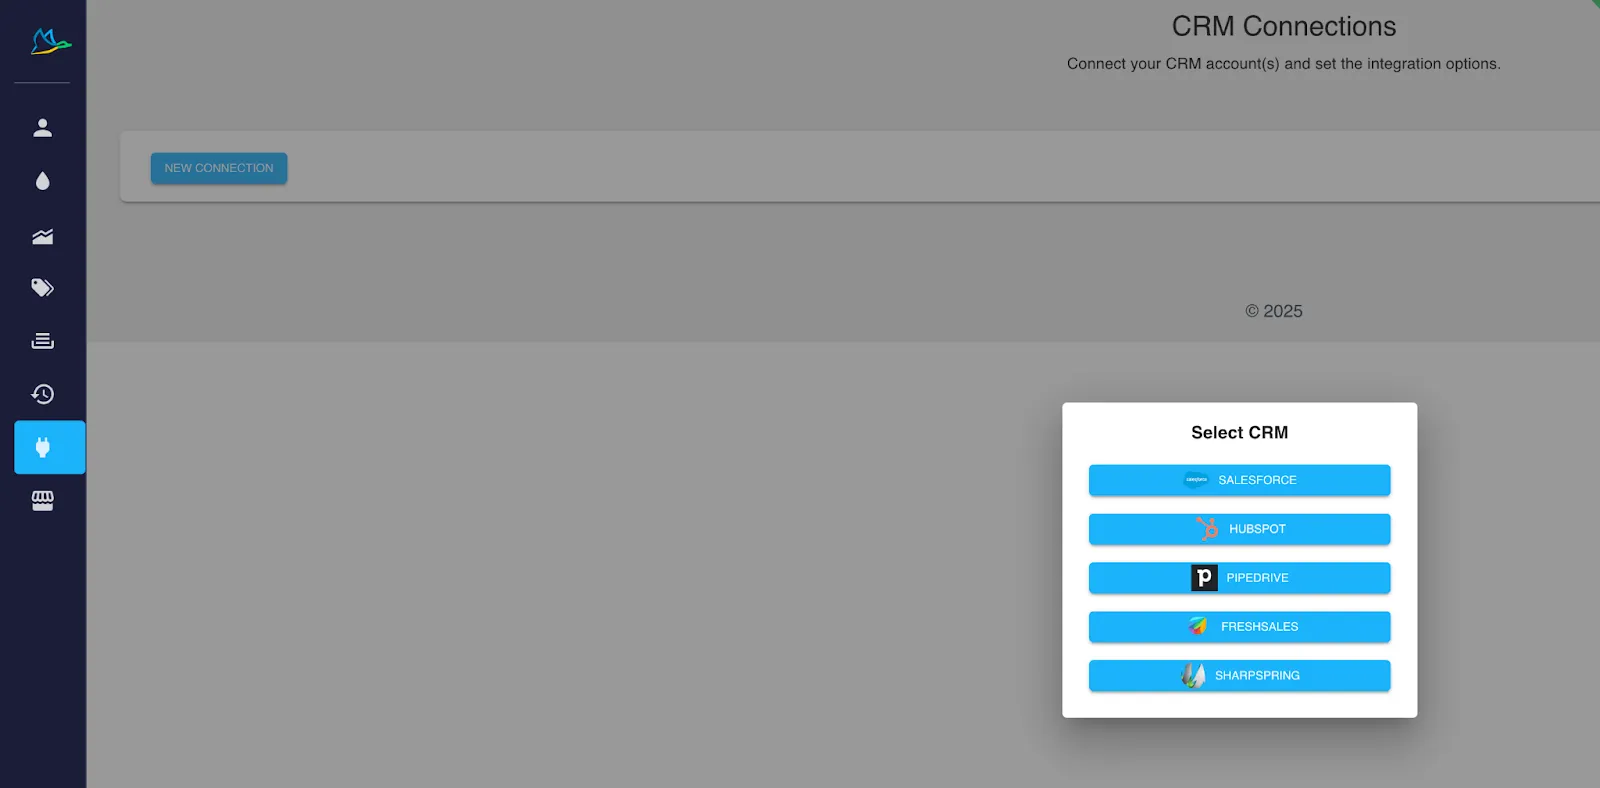
Then, head to “CRM Connections” and select “New Connection” and 'Pipedrive from the list. From here you will be directed to the Pipedrive Marketplace:
Alternatively, you can install the Dux-Soup Pipedrive Connector from the Pipedrive marketplace. You will then be asked to log in to your Pipedrive account.
For the app to function properly it’s critical that admin access to the Pipedrive system is granted during this initial install. Pipedrive will then display the consent dialogue, listing the access that is being granted. If the account does not have admin access, a warning will display at this stage.
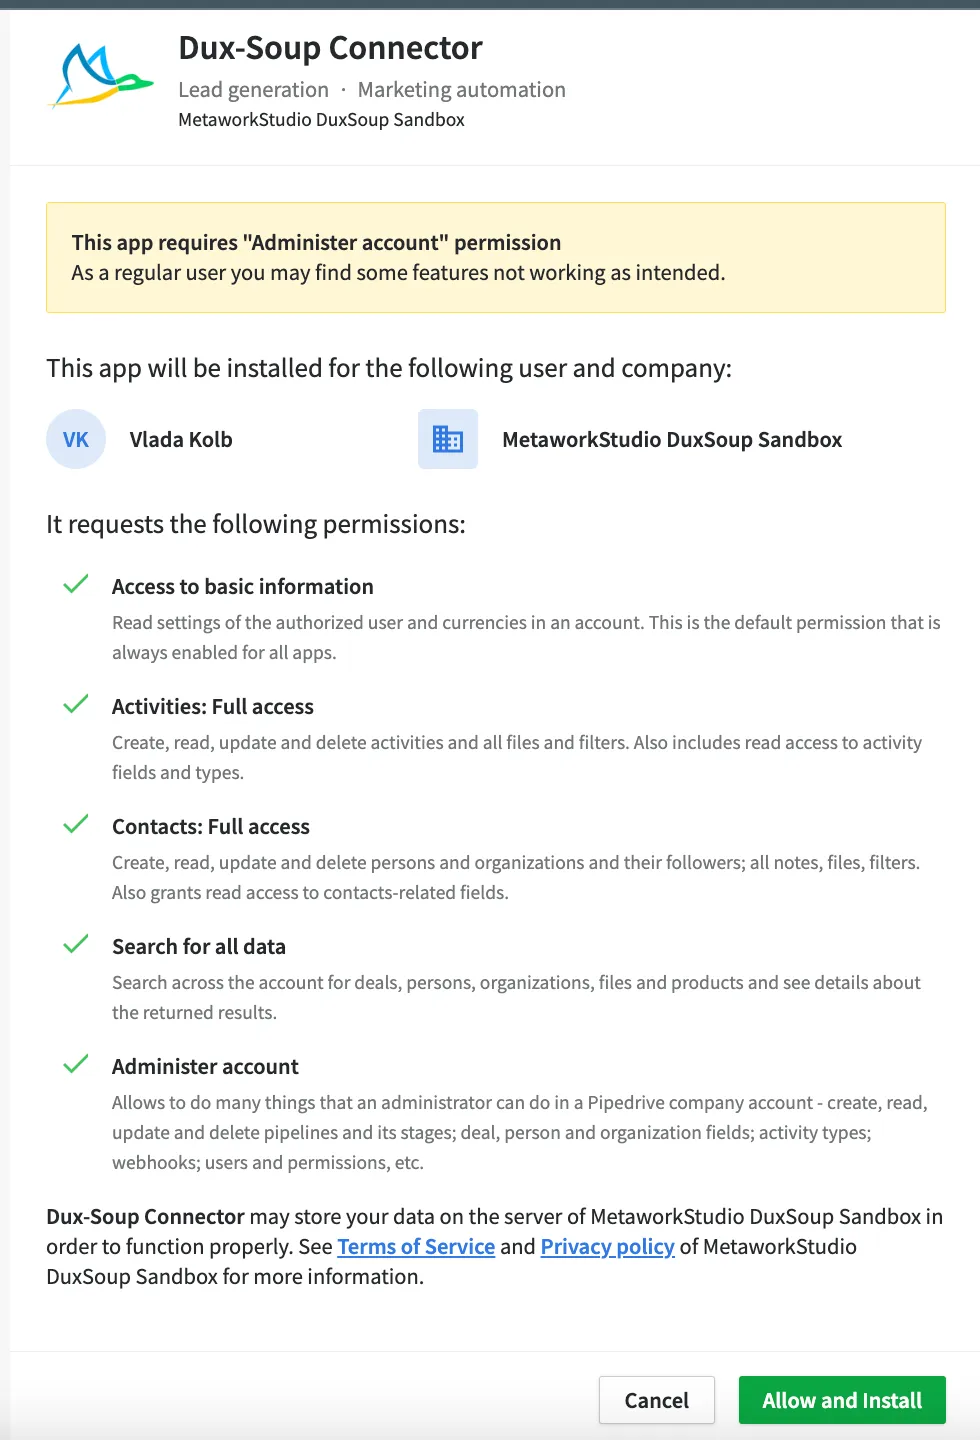
If this is the first time you are installing the Dux-Soup Pipedrive Connector, please make sure you login using an 'admin' account. This is because Dux-Soup will need to create additional fields for the People and Organization objects.
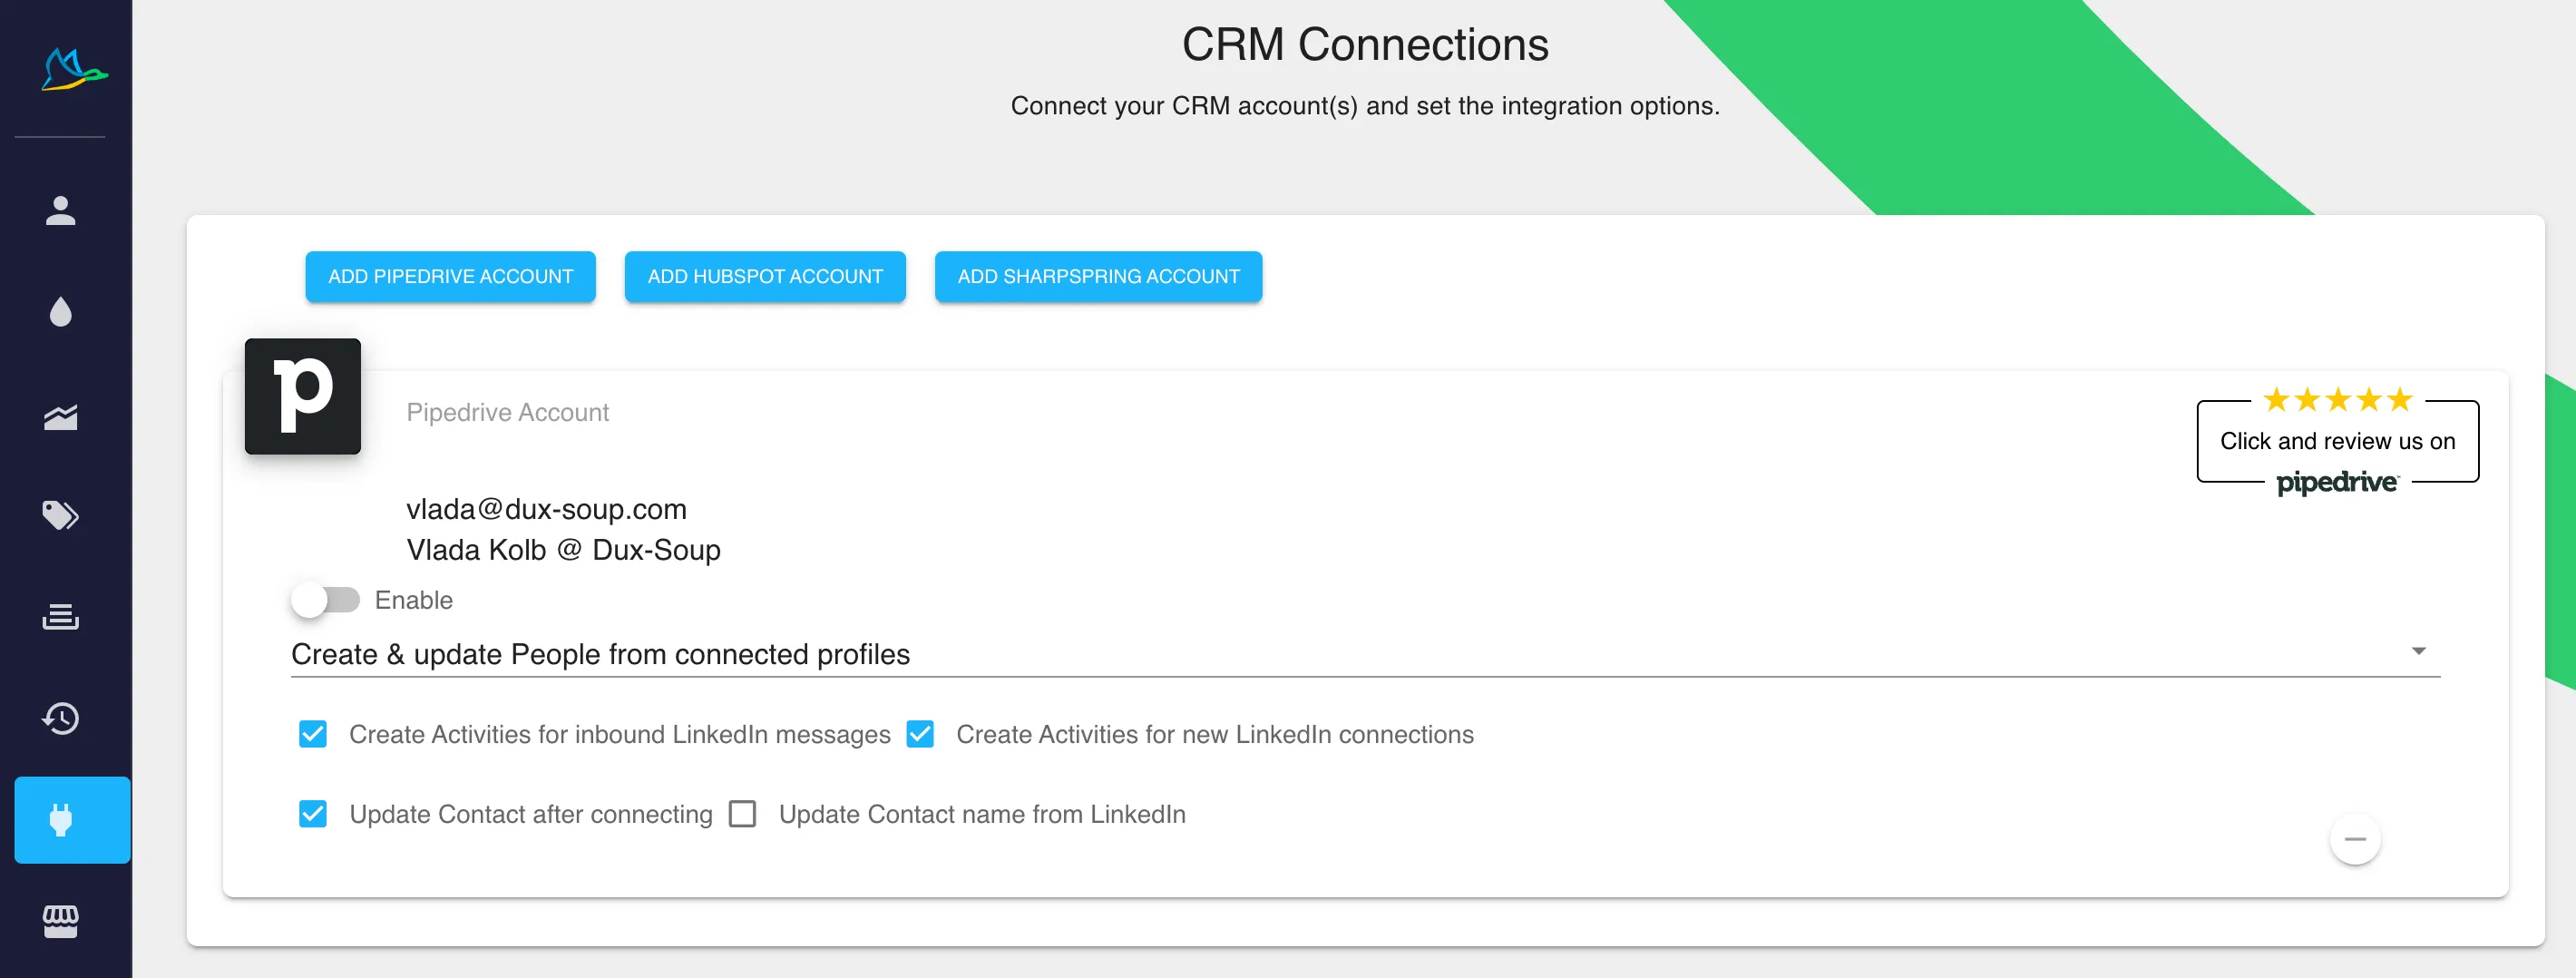
Afterwards, click on the “Allow and Install” button. The Pipedrive integration will appear in your Dux-Soup CRM Connections tab:
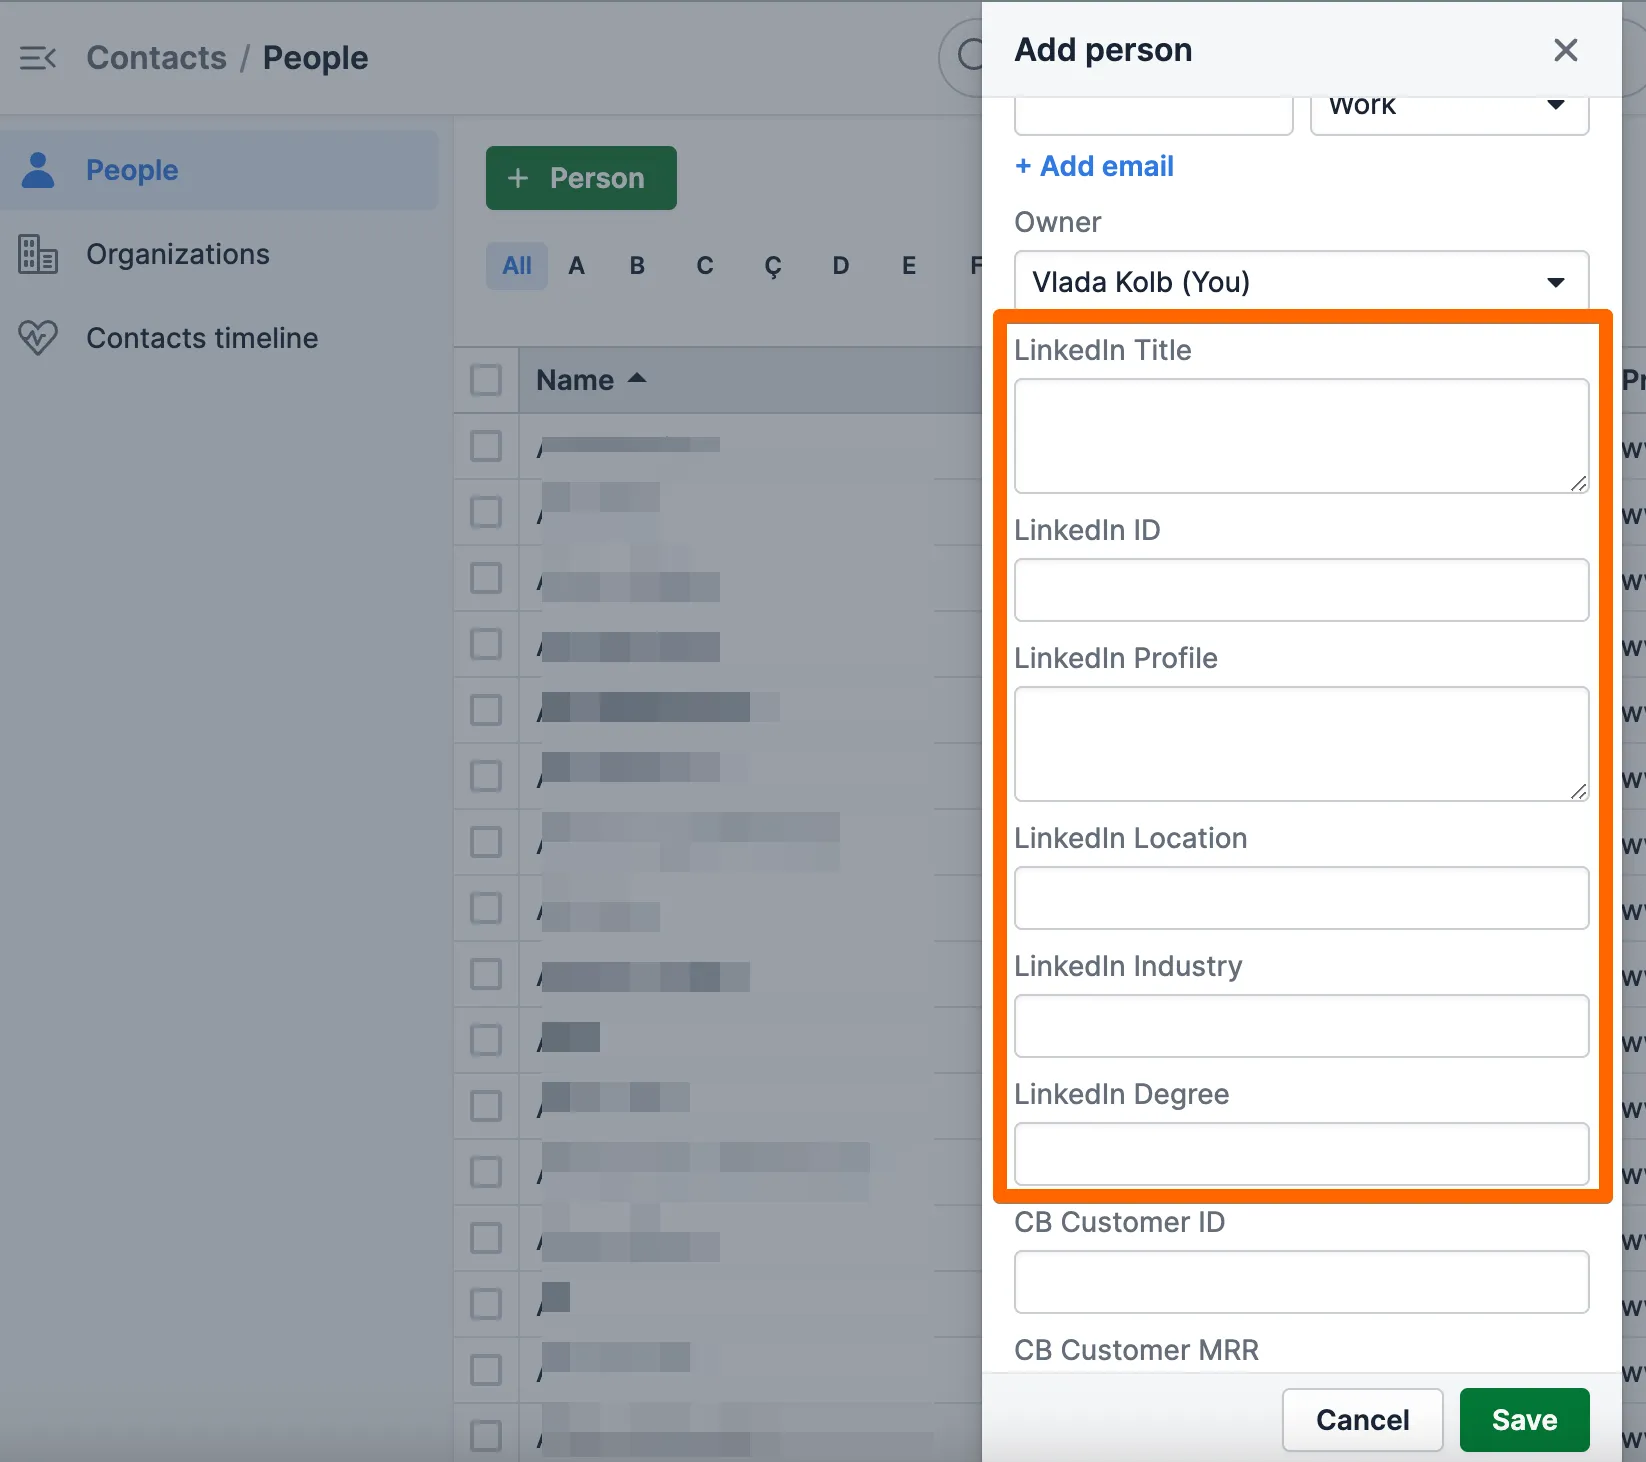
Now, when you open a contact in Pipedrive, you should see the newly added fields:
Creating and Updating Pipedrive Contacts from LinkedIn
Now that your integration between Pipedrive and LinkedIn is working, you can create and update contacts in Pipedrive from LinkedIn data using Dux-Soup. First, 'Enable' your Pipedrive integration by sliding the 'Enable' toggle to the right.
Then, select which contacts should be created and updated in Pipedrive:
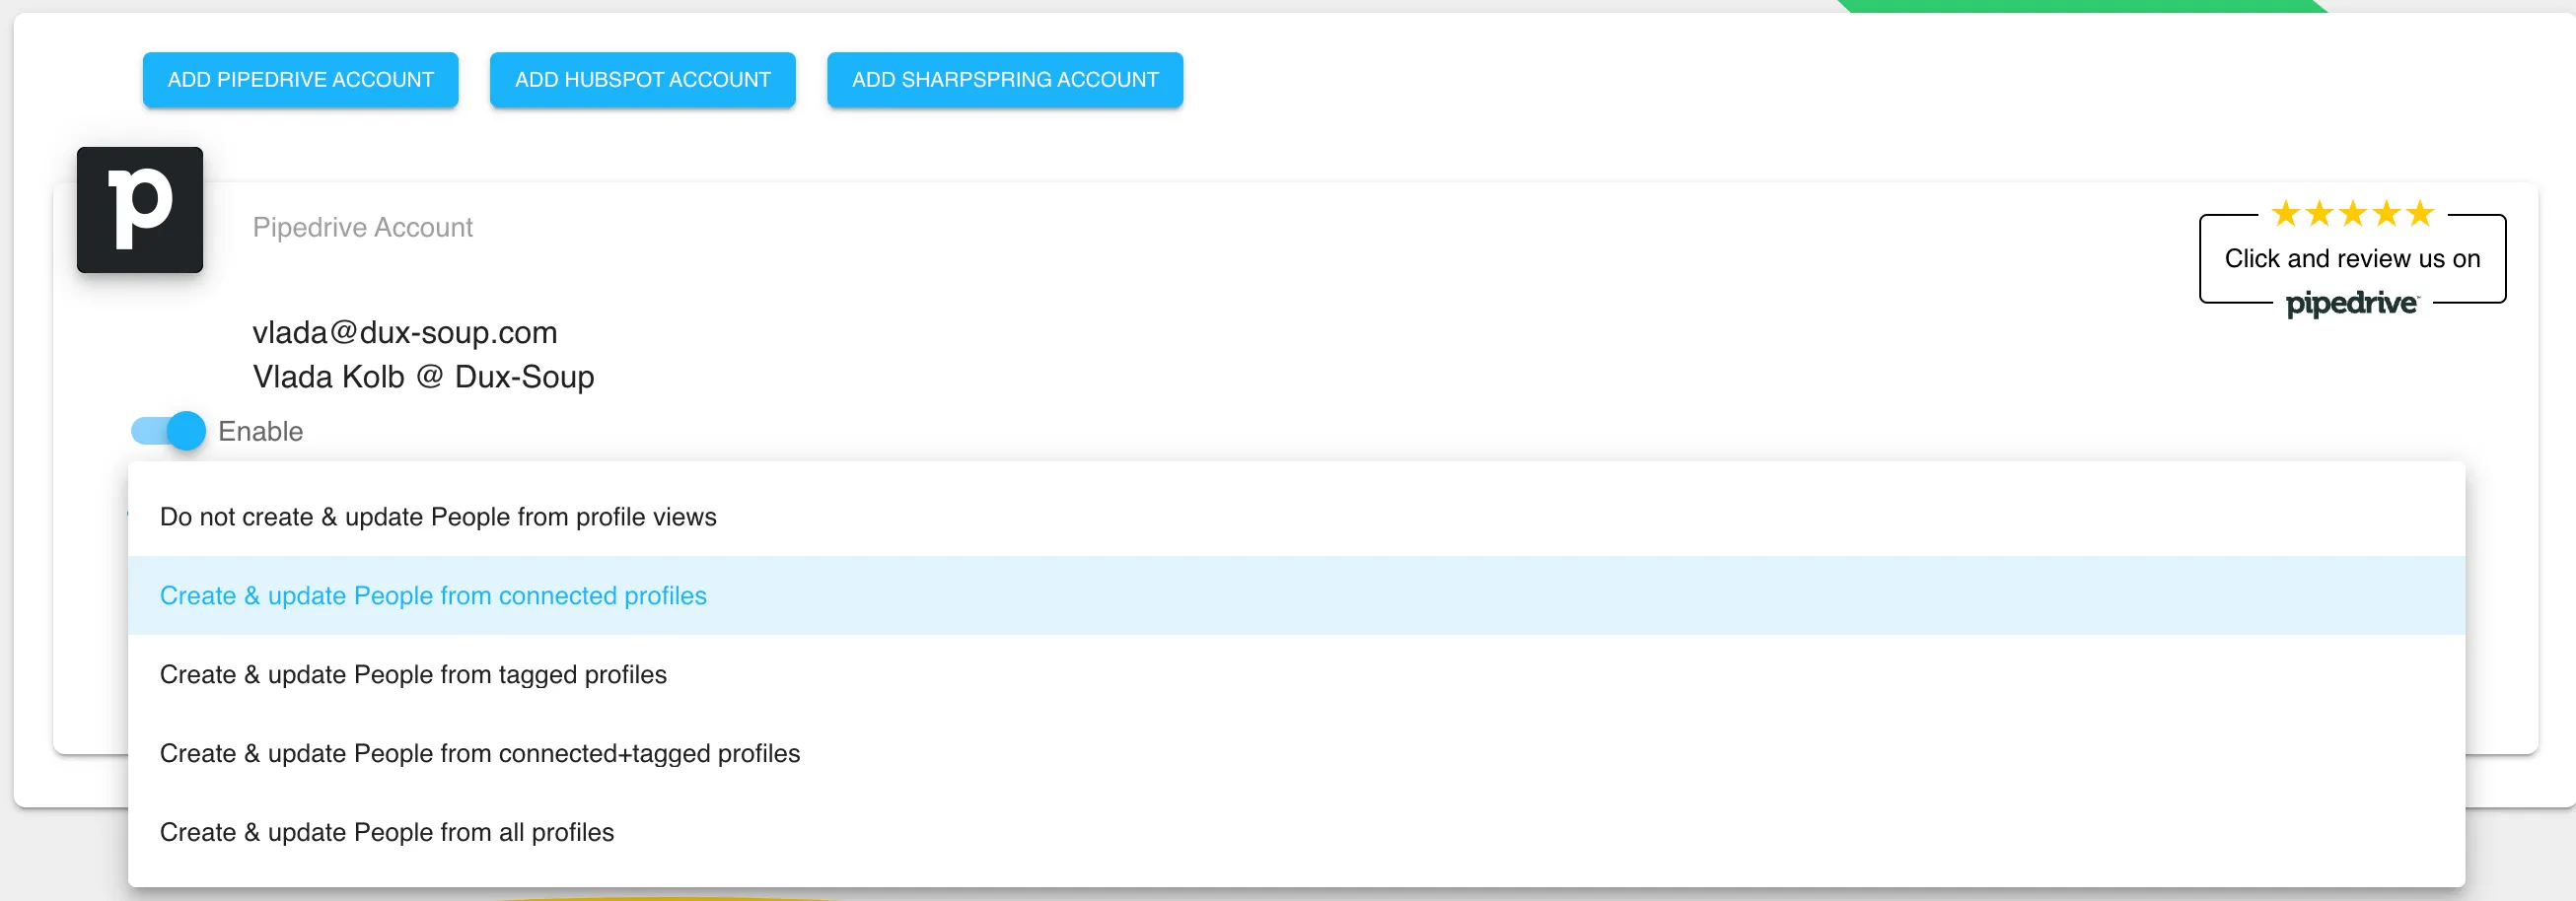
Every time Dux-Soup visits a profile matching your chosen criteria in LinkedIn, a contact in your Pipedrive account will now be automatically created or updated. We normally choose to create and update contacts from connected profiles only.
Creating Pipedrive activities for new connections and inbound messages
To create an activity in Pipedrive whenever you receive a new LinkedIn message, enable the option "Create Pipedrive Activities for inbound LinkedIn Messages" in CRM Connections:

Dux-Soup will add a new activity in Pipedrive when it detects a response message.
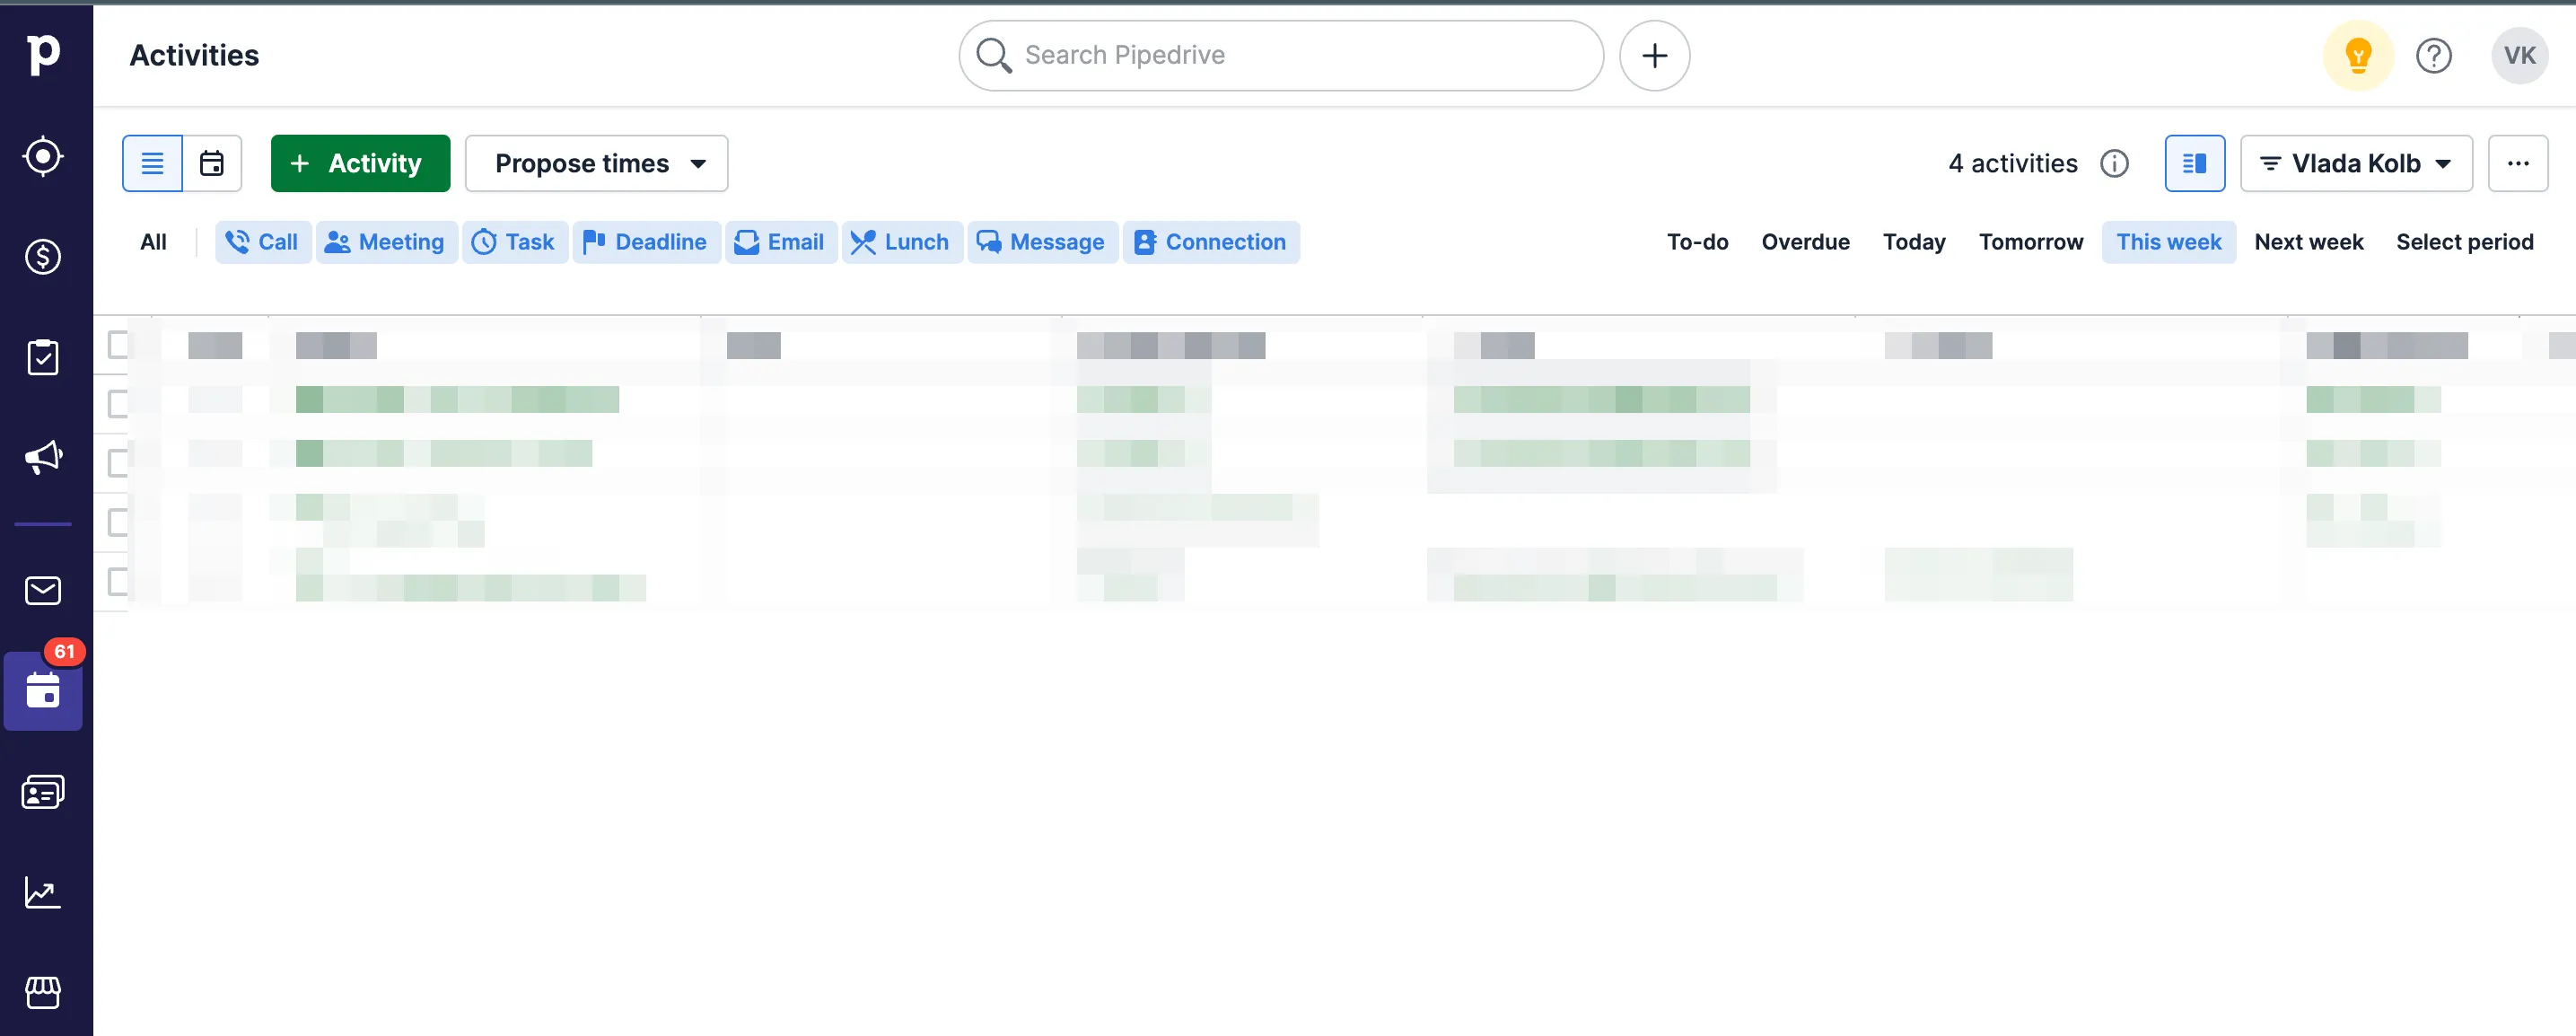
If you want to create an activity in Pipedrive once someone has accepted your connection request on LinkedIn, please enable the "Create Pipedrive Activities for new LinkedIn connections" option in CRM Connections:

Dux-Soup will add a new activity in Pipedrive when it detects a new connection.
Tip:
Make sure that your Message Bridge is enabled in the Options, Connect tab when you record the "Activity" or you want to update Pipedrive with a contact when you connect.
Note: In order to create an "Activity" in Pipedrive, the profile should already be recorded in the Contacts, People section in Pipedrive. Otherwise, the activity won't be added.
You might want to update a contact after the connection as it may contain the profile’s email. To do that, tick the option “Update Contact after connecting”:

And finally, if you want Dux-Soup to update the contact’s name from LinkedIn, check the last option:

Sending direct messages or connection requests from Pipedrive
To send a direct message or a connection request from Pipedrive, please make sure that the Remote Control option is enabled in the Dux-Soup Options, Connect tab:

Note: The Remote Control option is automatically enabled along with Webhooks and Message Bridge once you enable the Pipedrive integration.
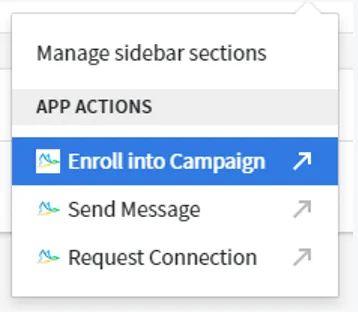
To run LinkedIn actions directly from Pipedrive or enroll profiles into campaigns, go to the Pipedrive Contacts, People section, select the person's profile that you wish to engage with using Dux-Soup and click on the 3 dots in the right-hand corner:

Write your direct message or connection message and click OK to send:
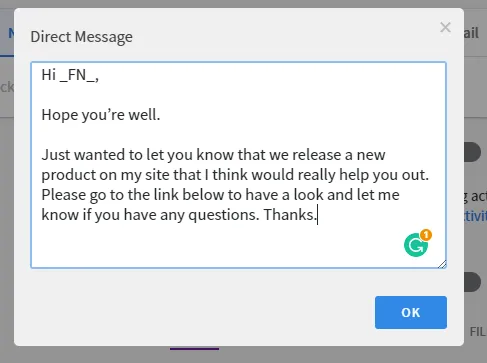
All message markers available in Dux-Soup will be recognized. Some useful tips and tricks about how to write direct messages can be found in our recent blogs Tips for Writing Direct Messages to your 1st-degree connections or How to write LinkedIn connection messages that get results.
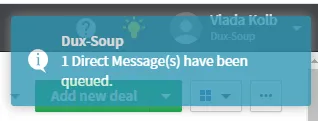
Once you click on ”Send Message” or “Request Connection”, you’ll see a Dux-Soup activity message that a certain action has been scheduled that will be executed straight away.
Enrolling Pipedrive contacts into Dux-Soup campaigns
You can also choose to enroll a profile into one of your Dux-Soup campaigns by selecting "Enroll" and then choosing the desired campaign from your drop-down list.
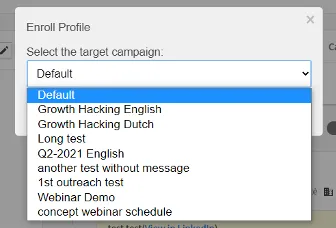
Dux-Soup will set to work, automating your campaign actions for you and personalizing your messages.
You can check for all your queued and completed activities - sent messages and connection requests within the queued activity section of the Dux-Dash.

Power up your Prospecting with Dux-Soup and Pipedrive
To learn more about how to power up your prospecting with Dux Soup Turbo and Pipedrive, take a look at our webinar recording on our YouTube channel, and see it in action.
Dux-Soup is already a firm favorite in Pipedrive’s App Spotlight and users are extremely happy to be able to integrate a vital piece of their lead generation activity into their CRM and wider sales & marketing process.
Check out our Dux-Soup Integrations pages, to see who else we partner with.
And remember, if you don't already have a Dux account, it couldn't be simpler - click here to get your FREE 14-day trial started today!


