In the run-up to Christmas, we're all busy planning our festivities and looking forward to a few days away from our laptops, hoping to spend quality time with friends and family.
While it’s lovely to send and receive physical cards wishing your clients and colleagues happy holidays, it’s not cheap, and nowadays - it’s certainly not the most environmentally friendly way of sending festive cheer!
But the good news is that we have a way of spreading festive cheer that's free, quick and easy, using the power of LinkedIn automation. All it takes is 6 easy-to-follow steps.
So, if you're looking to send e-cards out, then stop right here. We're about to show you how, with Dux-Soup Pro, Turbo or Cloud Editions, you can create a personalized e-card and send it out via LinkedIn.
And if you're not yet a Dux user? Not to worry, give our trial a go, and follow along!
So let's prepare to festive-up your LinkedIn messaging with our 6-step process, using Dux-Soup, and a few other free tools.
If you're finding any steps tricky, we’ve recorded a webinar session which includes demos to help you: How to send a personalized festive LinkedIn greeting.
Step 1 - Find your festive image
Find or create an appropriate image to start with. A free design tool such as www.canva.com is useful here, For the purposes of this blog, here’s our example:

Step 2 - Upload your image to NiftyImages
NiftyImages allows you to add a customization layer to your raw image, making it look more personal. You can get a free trial of NiftyImages, and customize your image for free.
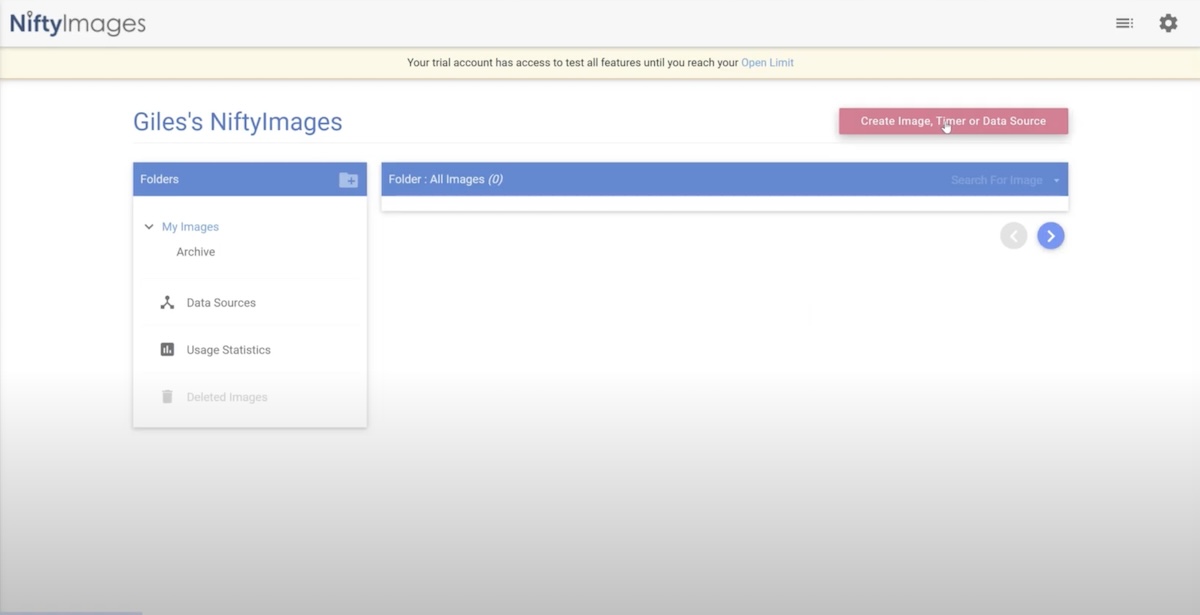
From the NiftyImages home page, click on 'Create Image, Timer or Date Source'.
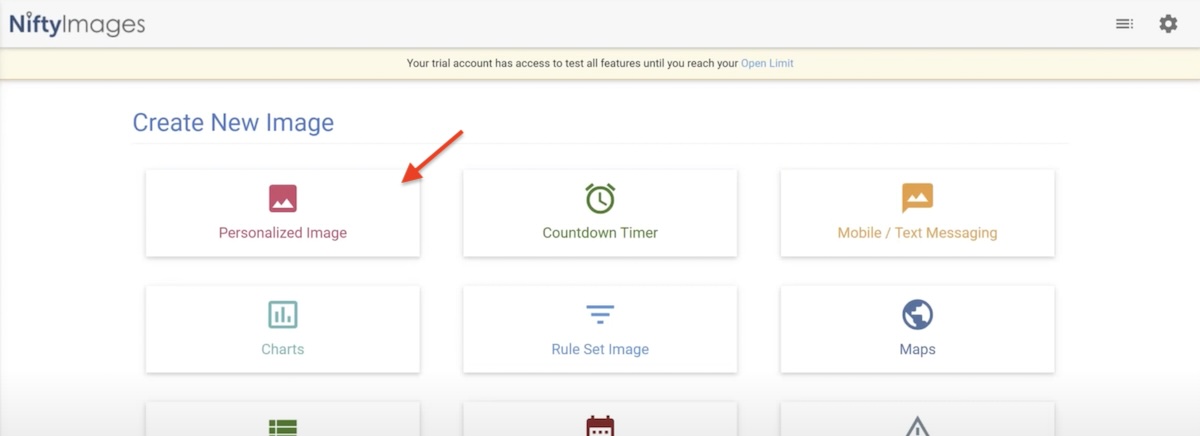
Then click on 'Personalized Image'.
Click 'Select Image' to choose your raw image to upload.

Your image should appear on the screen. Now let's get creative!
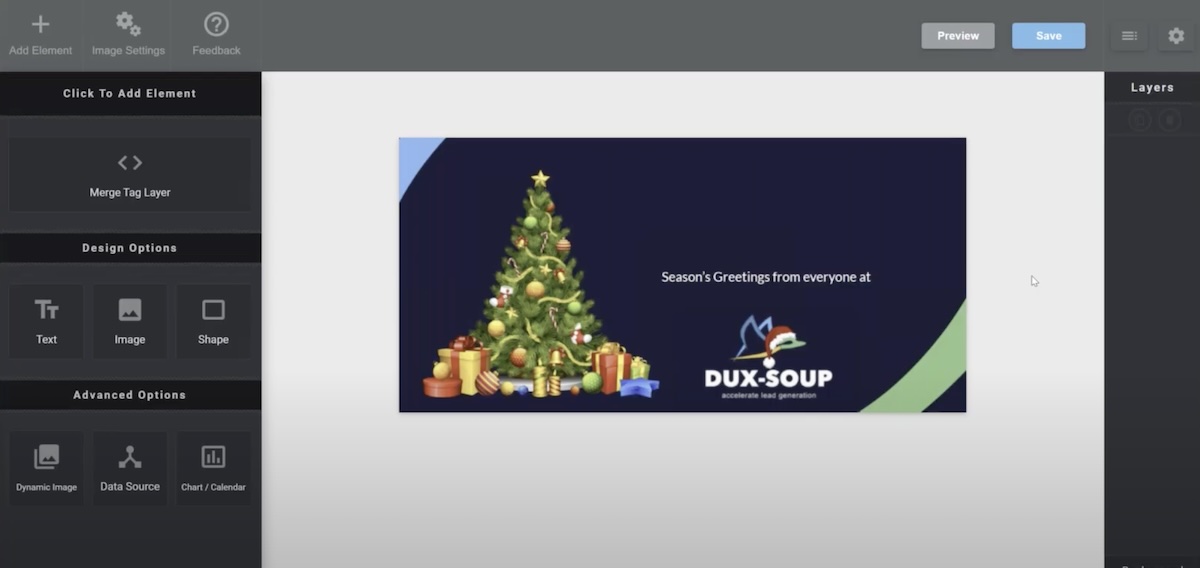
Step 3 - Customize your image
With NiftyImages you can add a ‘merge tag layer’ (this step may vary according to your chosen service). The ‘merge tag layer’ is where your dynamic text will be placed. So go ahead and click 'Merge Tag Layer."
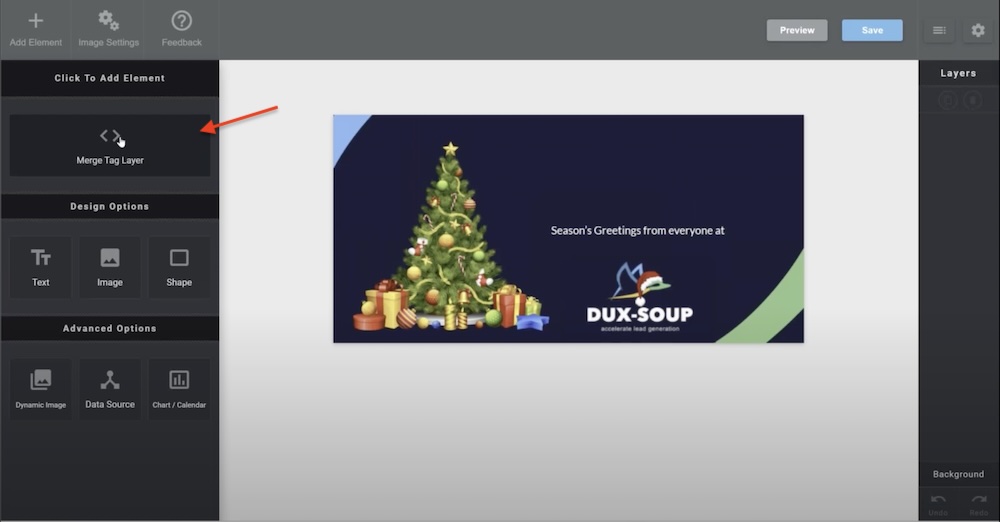
You can now add your Dynamic Text such as a First Name into your card. Or, add fixed text in the 'Design Value field'. Play around with your customization options until you’re happy with the location, format and layout of your design. You can change the font, font color and size to make sure it is on brand.
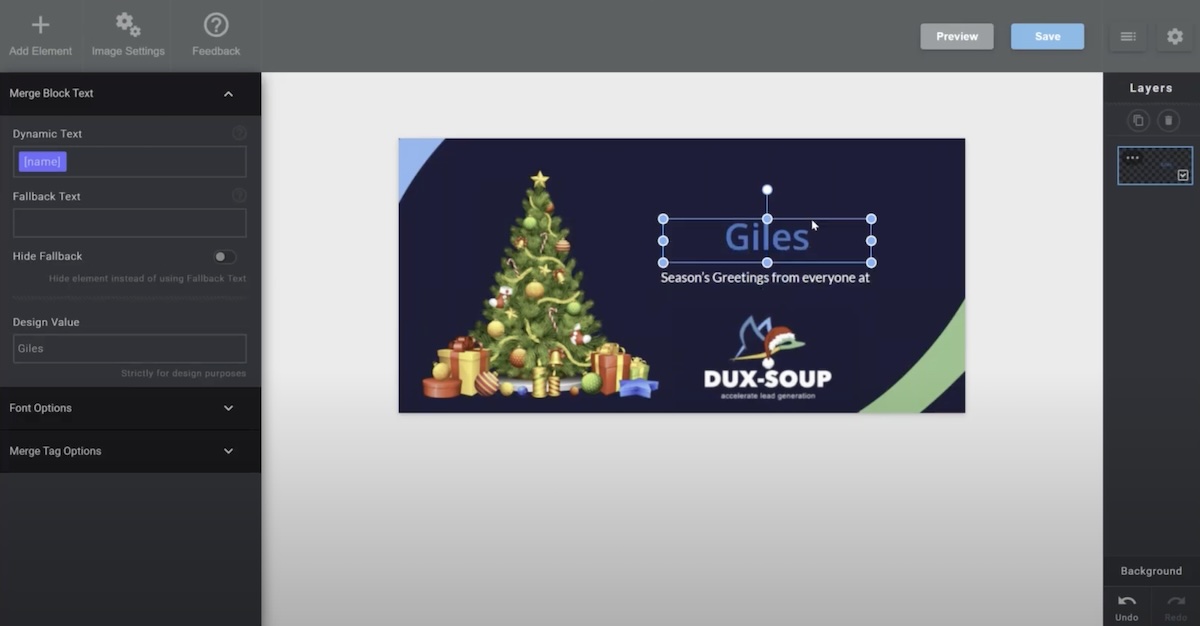
When you're happy with your e-card, save your image, which will create a URL for you to use in your Dux-Soup outreach.
** IMPORTANT - the only part of the URL we need is the part before the ? as we're going to personalize the message using a different Dux-Soup merge tag.**

Step 4 - Shorten the URL
This step is optional, depending on how long your URL is. You can choose to use a service such as https://tinyurl.com/app/ or https://bitly.com/ to shorten your URL.
Remember to only copy the URL before the ? as seen below.

And paste it into the URL shortener, e.g. TinyURL.
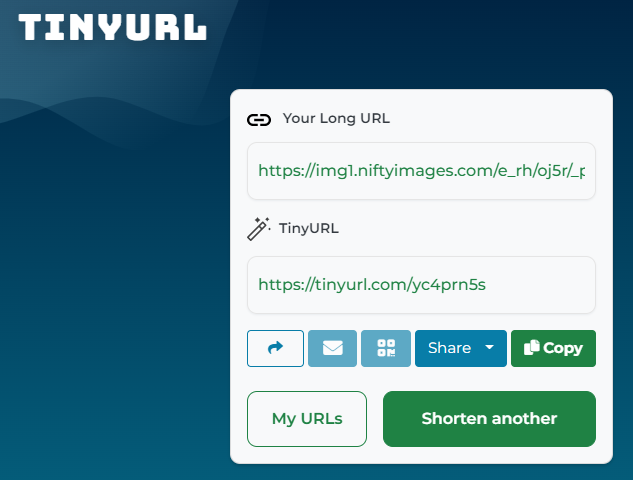
Now you have a shortened URL to copy.
Step 5 - Create your message in Dux-Soup
Paste the TinyURL in your outreach message, as shown below.
**IMPORTANT - To personalize your card with Dux-Soup you need to add the appropriate Dux-Soup ‘markers’ to your message- as shown here, ‘name=_FN_’**. This will merge their LinkedIn data into the e-card.
The best thing here is, that this could go into a direct 1st degree message, a campaign or even into an InMail message - so it really is a great way to spread festive cheer (or any other kind of cheer for that matter)!
If you're a Pro user, add your message in the extension - as shown below.

If you're a Turbo or Cloud User, add your message to a campaign in the Dux-Dash. You can remind yourself how to create your outreach messages at the 8-minute mark of our webinar. We show you some more Dux-Soup tips, like using tags to ensure you don't send to the same person twice!
Step 6 - Finding your list and automating actions
Find your list of 1st-degree connections on LinkedIn, by heading to 'My Network', and then 'connections'. When your list is ready, from your Dux-Soup extension click 'visit' to allow Dux-Soup to auto-visit your list and send your messages.
Or, enroll them into your chosen campaign if you are a Dux-Soup Turbo or Dux-Soup Cloud user. Remember to tag your prospects, so you know who has received the message.
The message preview in the recipient's inbox will look something like this.

You can send your e-card to other LinkedIn lists too, for example, all of your newsletter subscribers, or important prospects using InMail if you're not connected to them.
There you have it! Your 6-step process to sending out a free, festive greeting to your connections, using Dux-Soup.
Top tips:
- You can send several hundred messages to 1st degree connections per day - especially if you have a paid LinkedIn account. Check out our Dux-Soup daily limits blog for guidance
- Pro - use 1st degree / direct messaging
- Pro - Tag those you send it to and use your skipping rules to ensure you don’t send it twice!
- Turbo & Cloud - create a campaign and enroll
- Send using Regular LinkedIn and then the thumbnail will show
DON’T FORGET - If you’d like to get started with Dux-Soup, why not give our 2-week free Dux-Soup trial a go, what have you got to lose??


