1st-degree drip campaigns with Dux-Soup
So, you’ve made some awesome LinkedIn connections and you know it's time to start thinking about incorporating 1st-degree direct messages into your LinkedIn outreach strategy, but have you ever wondered how to create a 1st-degree direct message drip campaign using LinkedIn automation? Wonder no more! Thanks to Dux-Soup, it's easier than ever.
Dux-Soup can help you to build a strong, engaging and professional 1st-degree network for success. In this blog post, we'll show you how to create and run a drip campaign for your existing connections. Let’s get started and learn how to make use of your extensive or perhaps dormant connections!
Note that a Dux-Soup Turbo or Cloud plan is required to unlock a drip campaign feature, but with our 14-day free Dux-Soup trial, you can get started straight away - we don’t even ask for your credit card details!
If you are new to drip campaigns, read our recent blog about how you create smart LinkedIn lead generation campaigns to find out what a Dux-Soup drip campaign is and how they work.
5 easy steps on how to batch-enroll your 1st-degree connections to the LinkedIn campaign
To create and initiate a drip campaign for your 1st-degree connections, follow these steps:
Step 1: Create your campaign
From the Drip Campaign menu in the Dux-Dash, click on 'New Campaign'. Name your campaign, and choose whether your campaign will run in LinkedIn, Sales Navigator or Recruiter. Any replies will go to your chosen platform. You can also choose to reject profiles from other campaigns, and tag profiles with the campaign ID when Dux-Soup auto visits a profile.
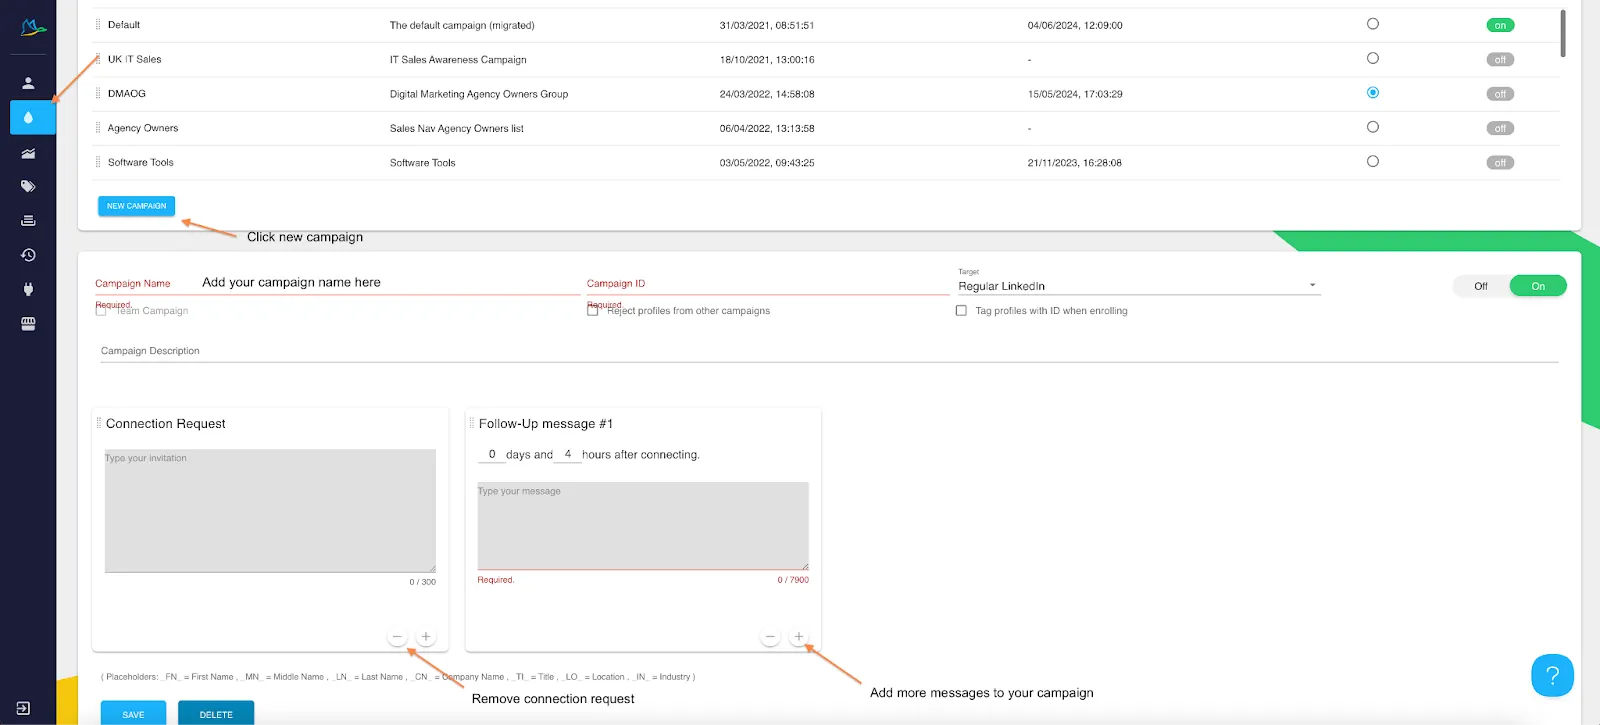
Remove the Connection Request step from your campaign sequence by clicking on the - button at the bottom right corner of that first box. Now create your sequence of direct messages, adding up to 12 messages or actions using the +button at the bottom of the boxes.

You can personalize your message using the merge tags underneath your campaign.
When you're done, don’t forget to click ‘Save” at the bottom!
Step 2: Find your connections in LinkedIn
Locate your 1st-degree connections list by clicking on the Dux-Soup icon and selecting the ‘Search’ option.
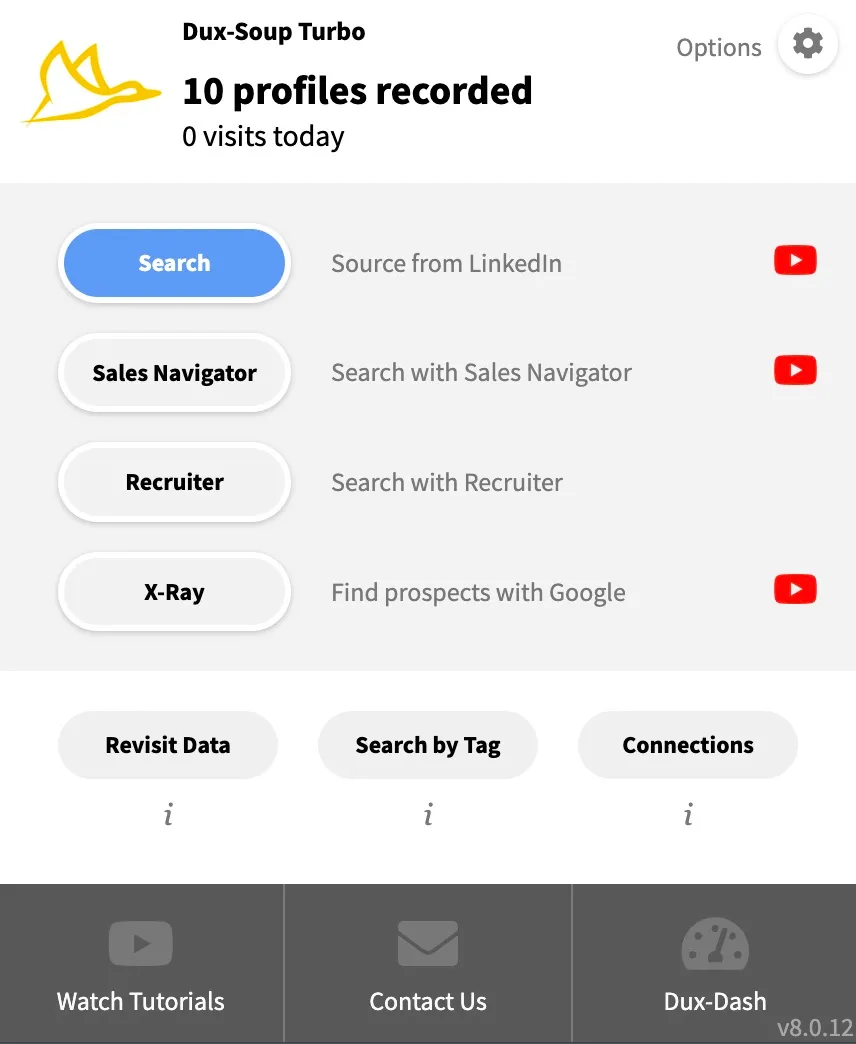
Step 3: Refine your list
Make sure you filter your search by 1st degree and apply other filters* that help you to define your audience:
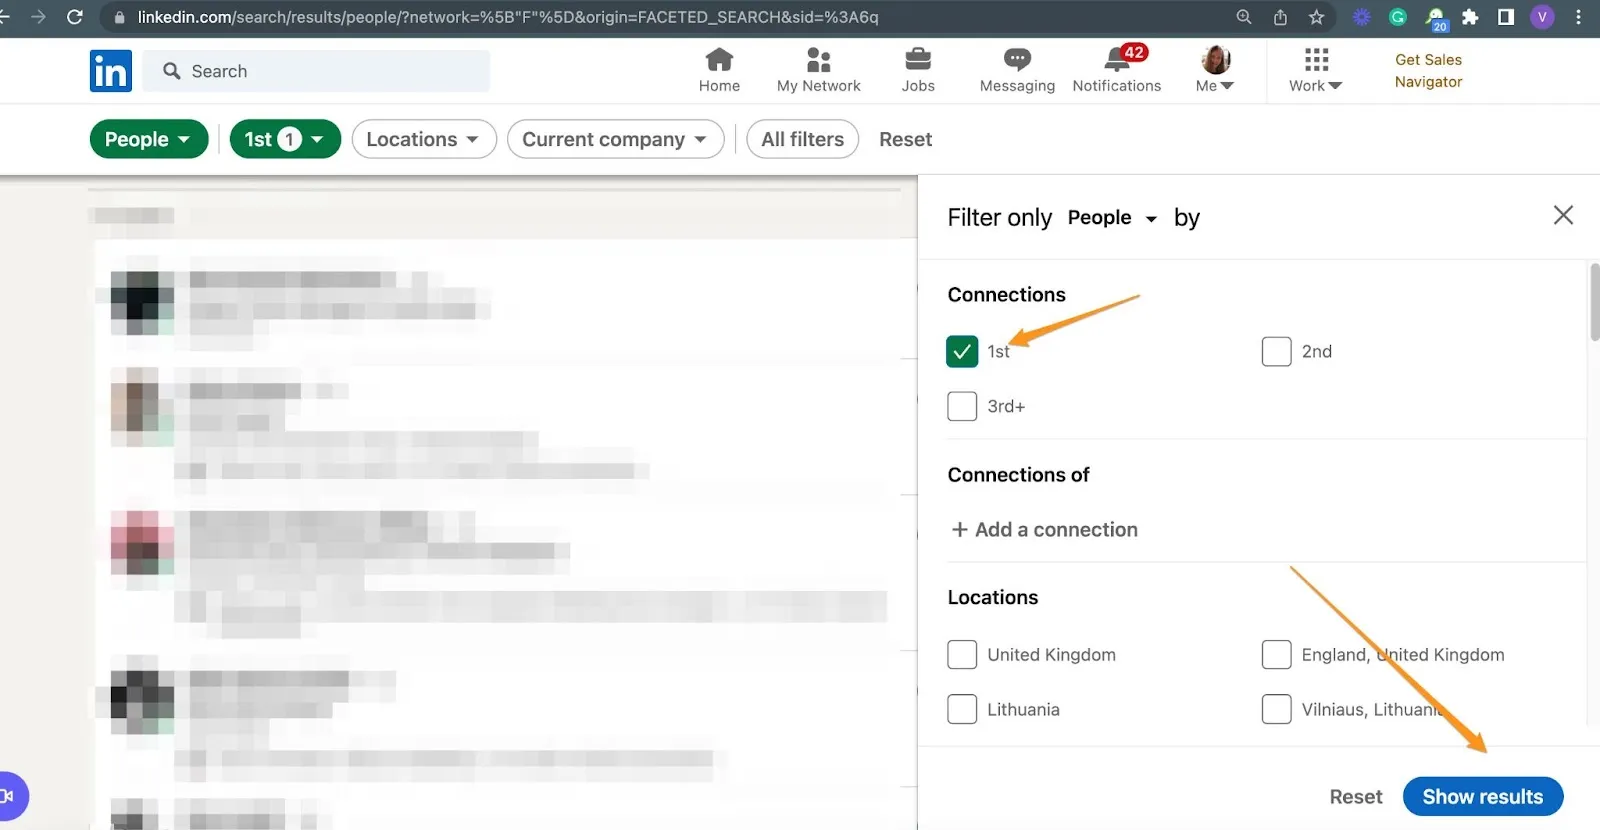
*If you use Sales Navigator, you can also access a higher search allowance (up to 2500 profiles per search) and advanced search filters.
Step 4: Enroll your Profiles
Now, click on the Dux-Soup icon and select the ‘Enroll Profiles’ option:
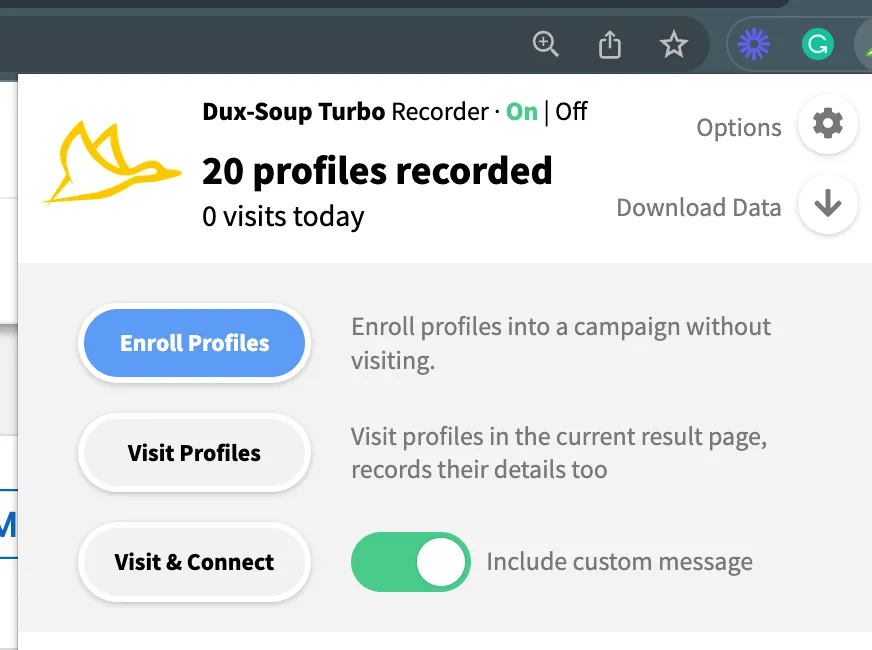
Step 4: Select the right campaign
Select your campaign of choice from the drop-down and click ‘OK’. Then, leave it to run. You will see a green message dialogue, confirming that profile ‘X’ has been enrolled:
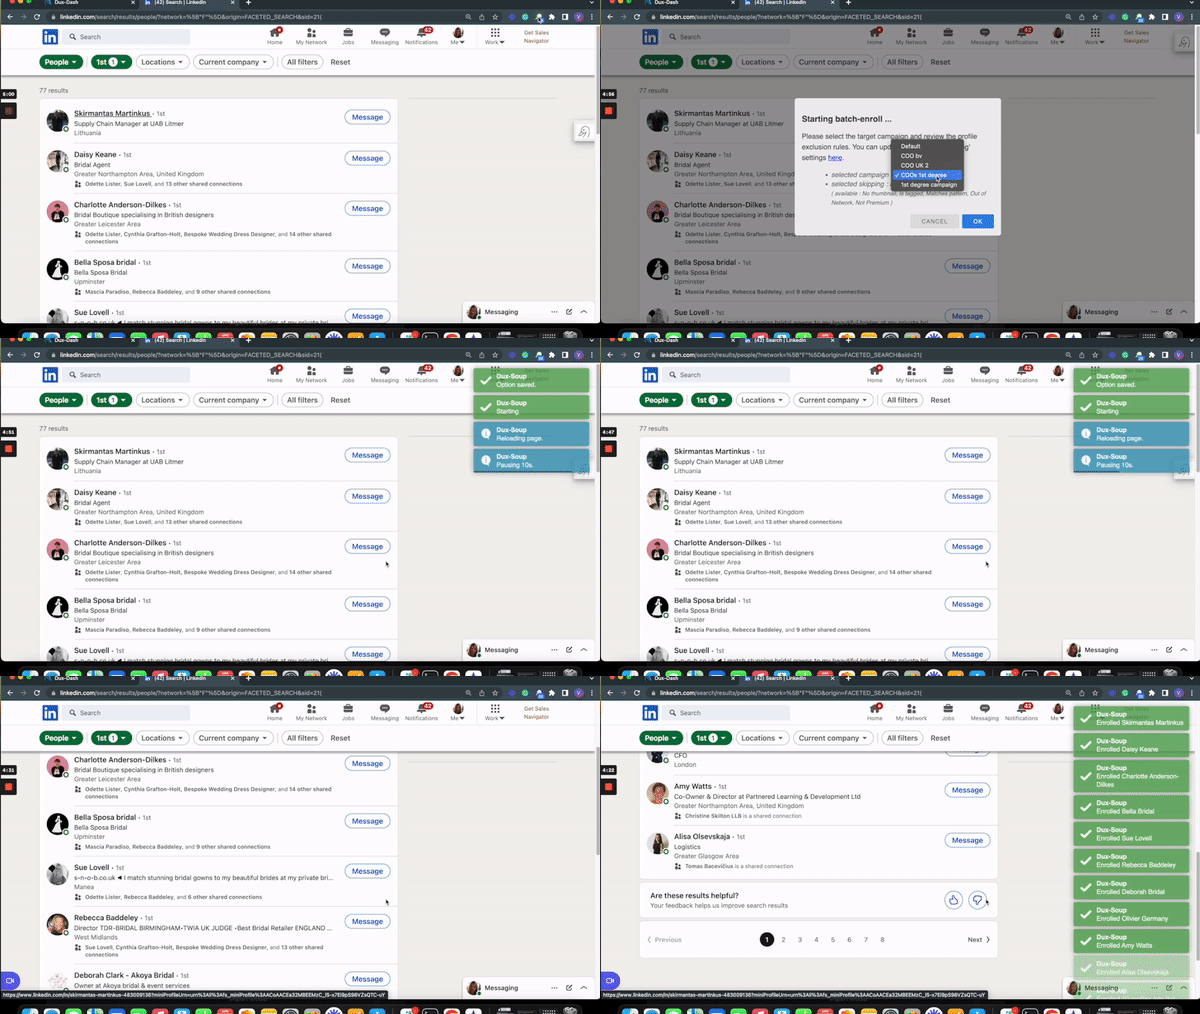
That’s it, you have added your chosen 1st-degree profiles to the campaign. Now, Dux-Soup will schedule all the campaign messages according to your set delays and add them to the follow-up queue in the Dux-Dash.
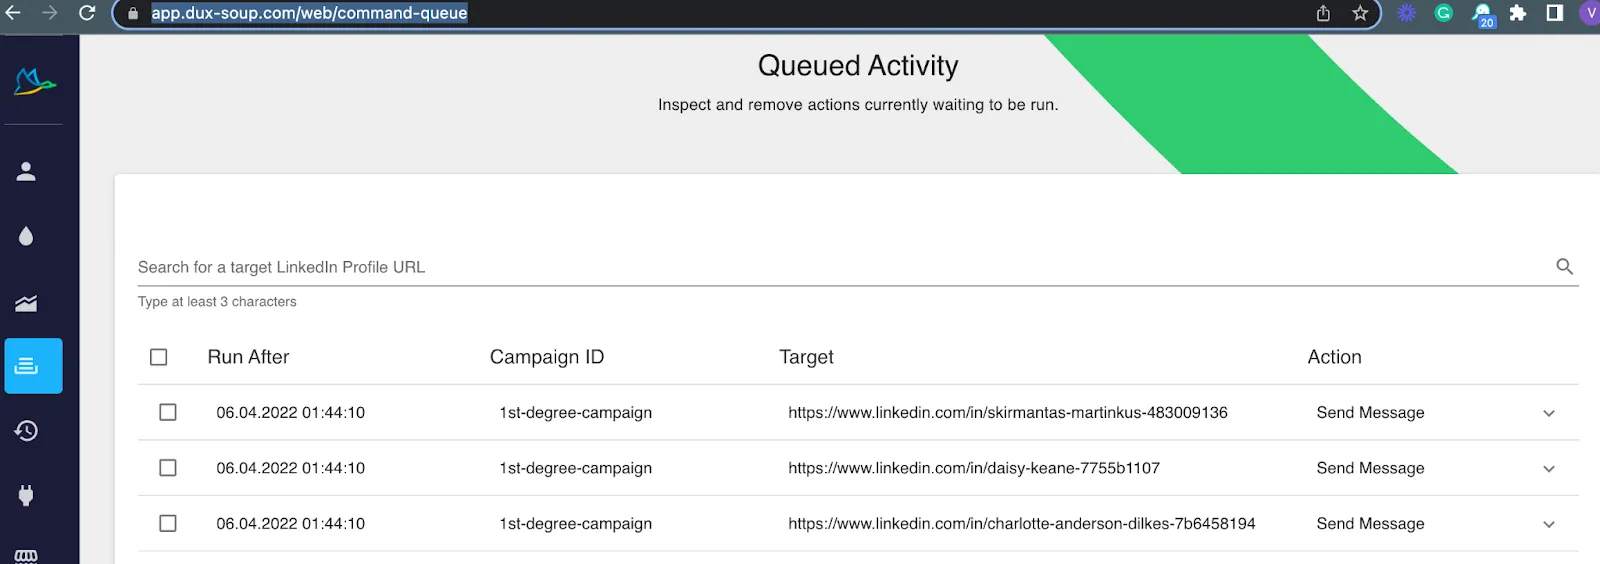
You can enroll profiles into multiple drip campaigns, however, please note that when enrolling a 1st-degree profile in a 2nd campaign, you could have two different actions scheduled to go to the same prospect. You can choose to 'switch campaign' from the Funnel Flow section of the Dux-Dash rather than enroll a profile into two different campaigns.
Learn more about Dux-Soup ‘Enroll Profiles’ by taking a look at our recent blog.
Semi-automated 1st-degree drip campaign
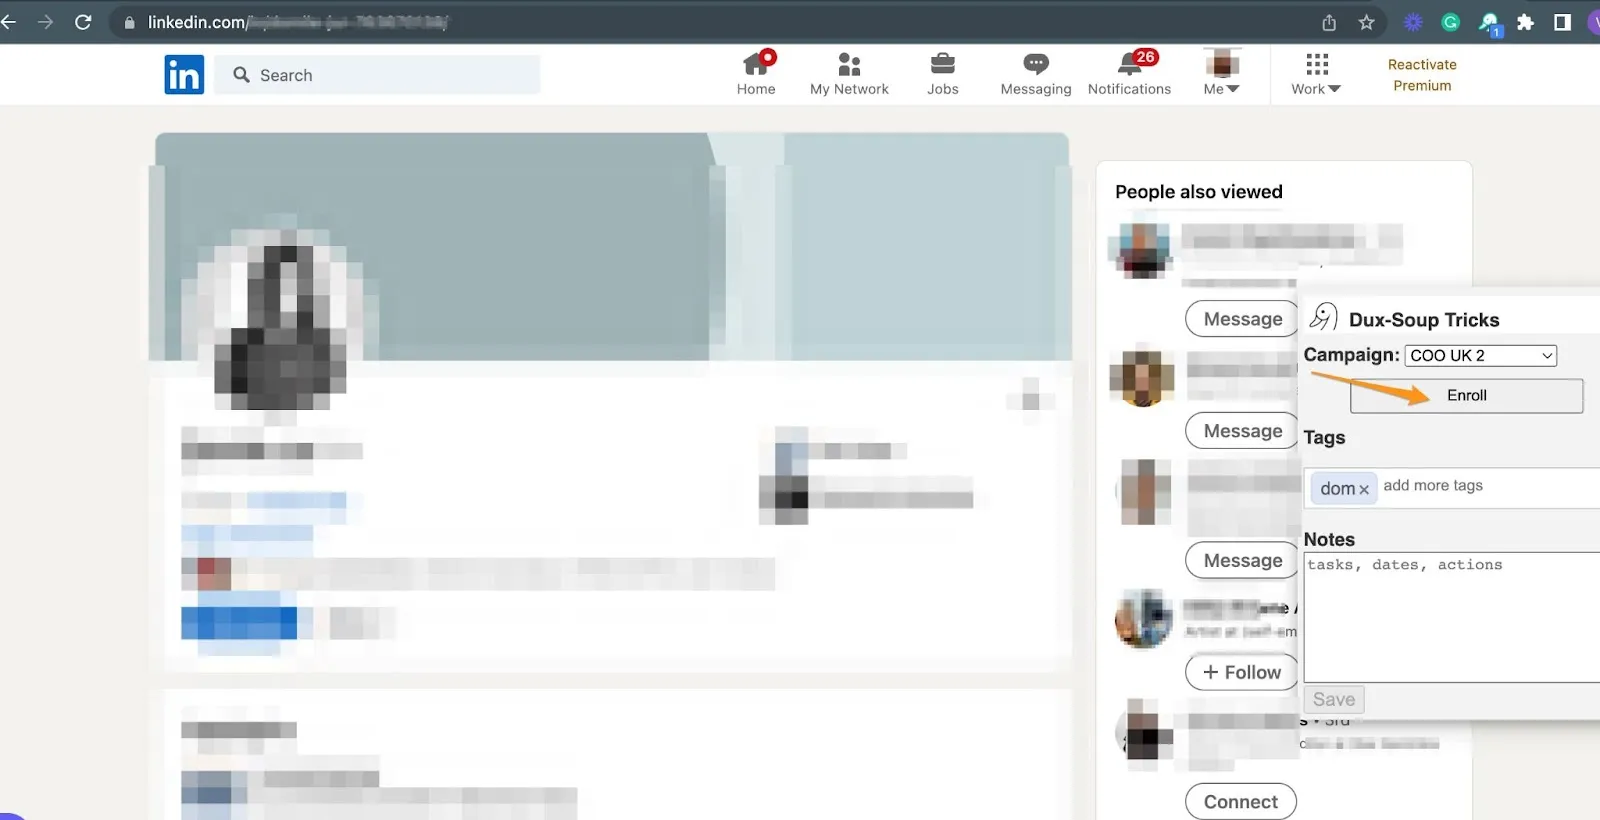
Not sure if you want to add the whole list of profiles to your campaign? Then use a semi-automated enrollment option. You need to locate the 1st-degree profile list the same way as described above (steps 2-3), but instead of using the Dux-Soup drop-down menu, hit Dux-Soup Tricks located on the right-hand edge of the screen:
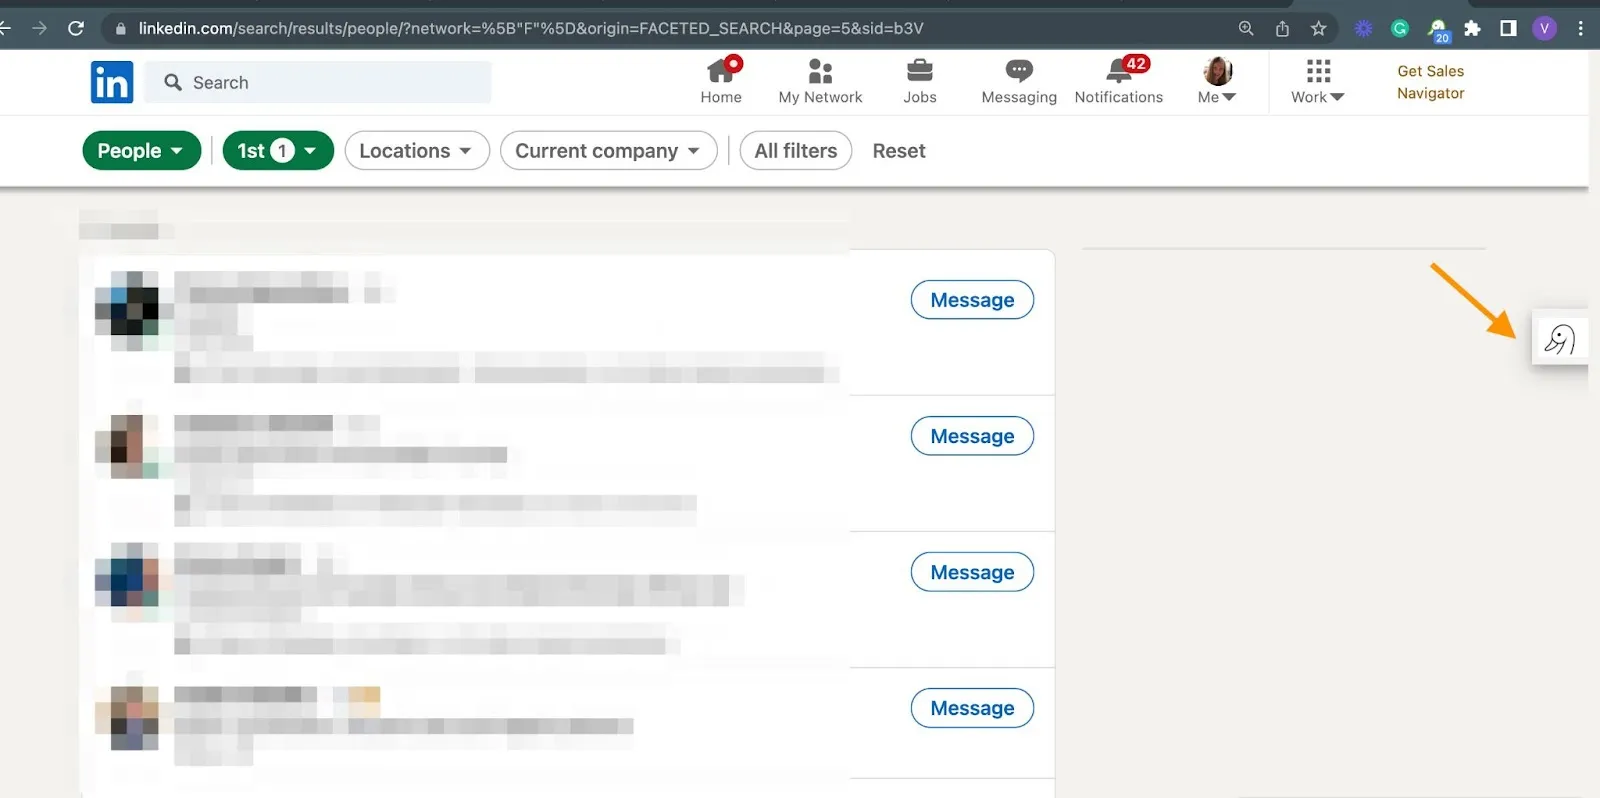
Now, you can scroll down your list and enroll profiles individually from the search results:
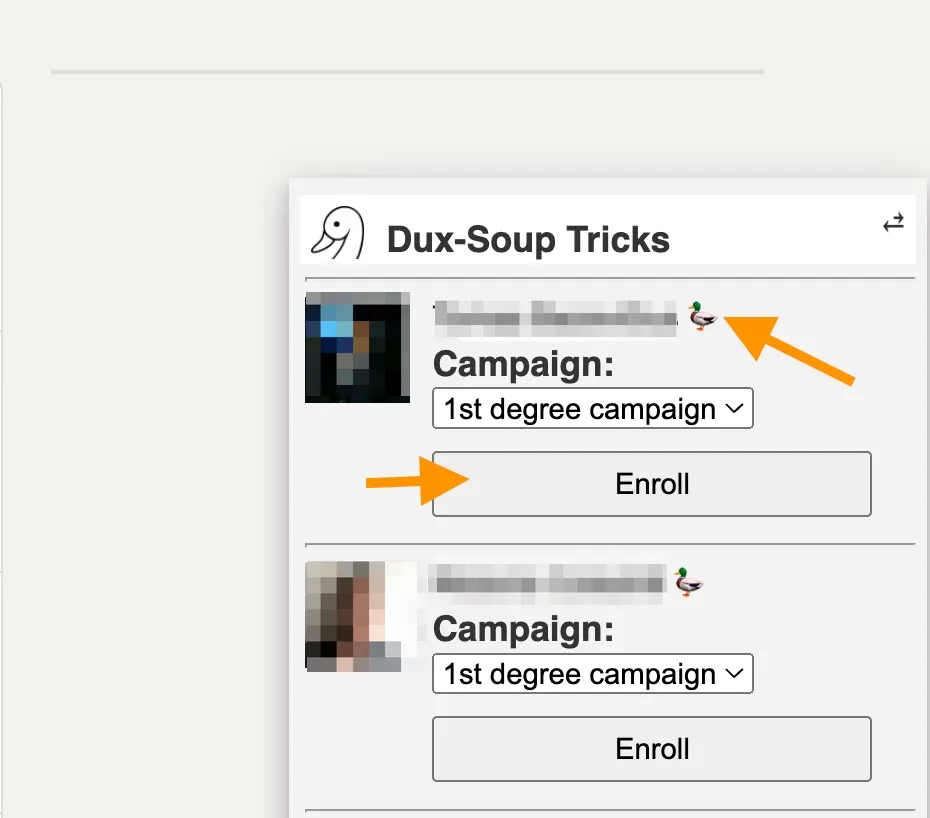
and from a LinkedIn profile page!
Tip: A duck icon located just next to the profile’s name indicates the number of campaigns the profile is enrolled in.
Note: Dux-Soup Tricks for list enrollment only works on LinkedIn and Sales Navigator search results pages.
Monitor your lead generation funnel flow
To monitor the campaign’s performance, open the Dux-Dash, Funnel Flow.
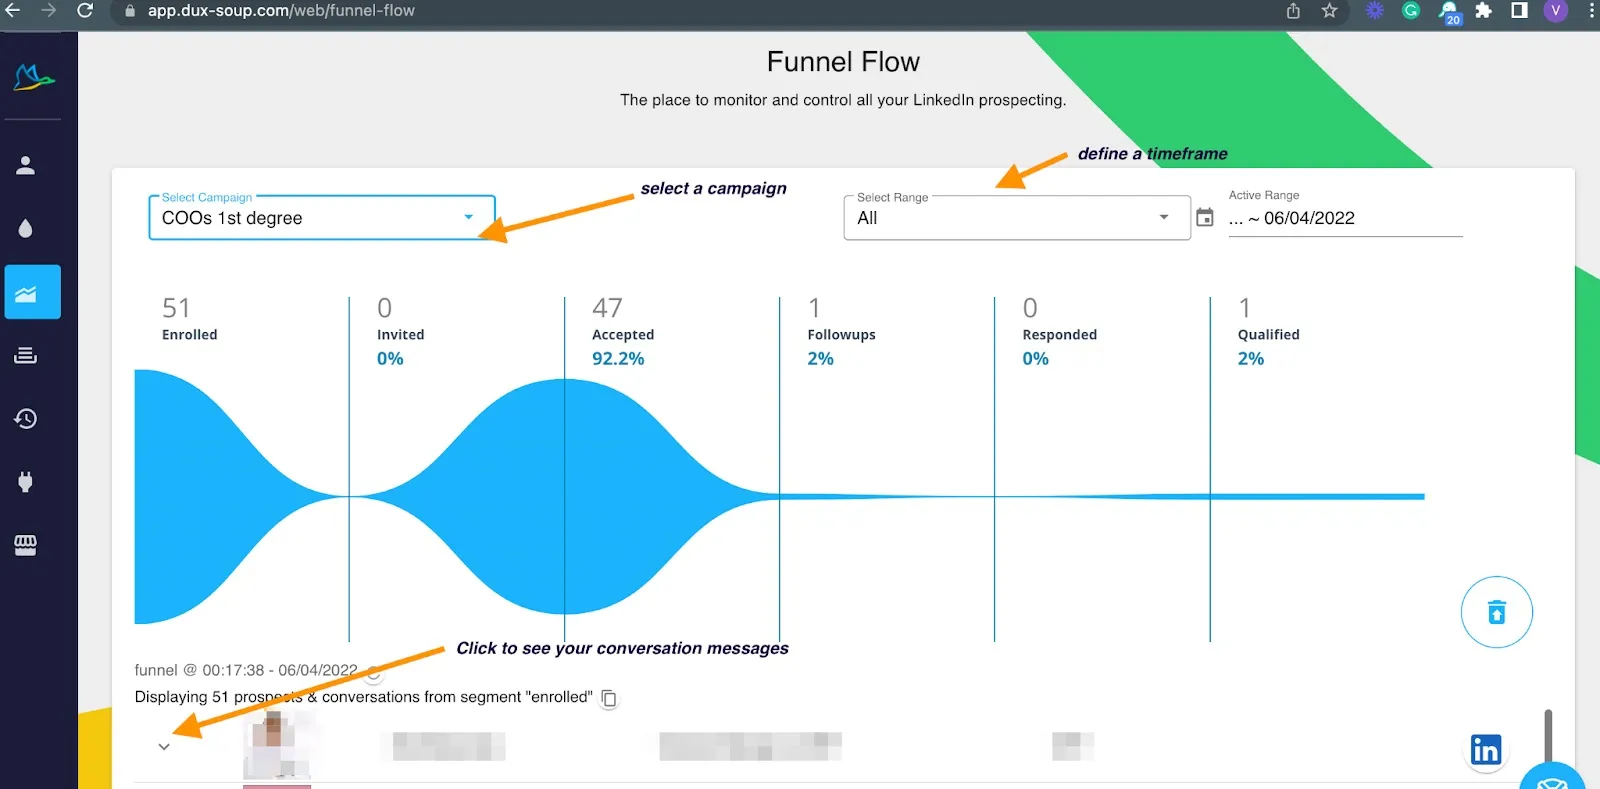
Using Dux-Soup’s Funnel Flow, you can:
- See your conversion rates at a particular stage
- Choose a timeframe
- Read your conversation messages
- Qualify in, reflow or qualify prospects out of your lead generation funnel
- Copy the data from a particular section, and more!
If you’re looking for a way to increase sales and keep in touch with your current connections, consider using Dux-Soup as part of your LinkedIn marketing strategy. The process is simple and can be automated within a few clicks. Follow these five simple steps and you’ll be on your way.
Keep in mind that the more targeted and relevant your messages are, the better your conversion rates will be. Make sure to monitor the performance of your campaigns so you can continue to improve and refine them. And finally, get started today! The sooner you begin, the sooner you’ll see results.


