Google Sheets has a rich scripting language that allows you to do all sorts of automation for your spreadsheets. This means you can trigger webhooks from Dux-Soup straight to Google Sheets without using Zapier or Integromat. How cool is that!
In this easy step-by-step guide, we will show you how to trigger the visit webhook with Google Sheets using the custom script. We’ll keep the coding side of things light to keep it simple!

Note: You need a Dux-Soup Turbo or Cloud Edition for this to work. You can get a free Turbo trial when you hit the button below
Dux-Soup + Google Sheets: Step-by-Step Guide
In Google Sheets, you can deploy your script as a web app that generates a unique URL you can make requests to by pasting it to Dux-Soup Options, Connect tab - to initiate your script.
In order to connect the visit event from Dux-Soup to Google Sheets, follow these steps:
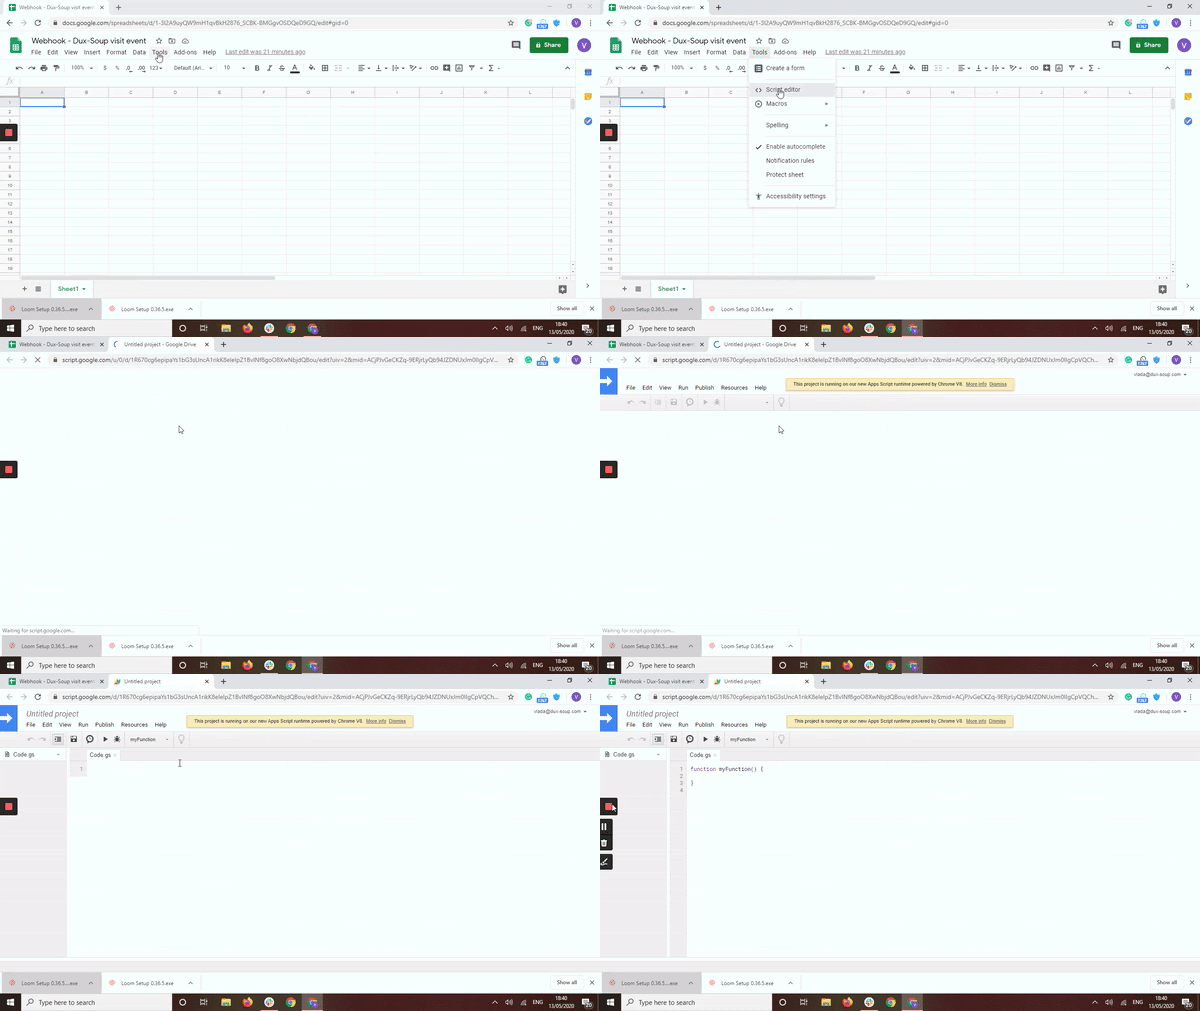
1. Open a new Google Sheets form.
2. Go to the Tools menu and select Script Editor.

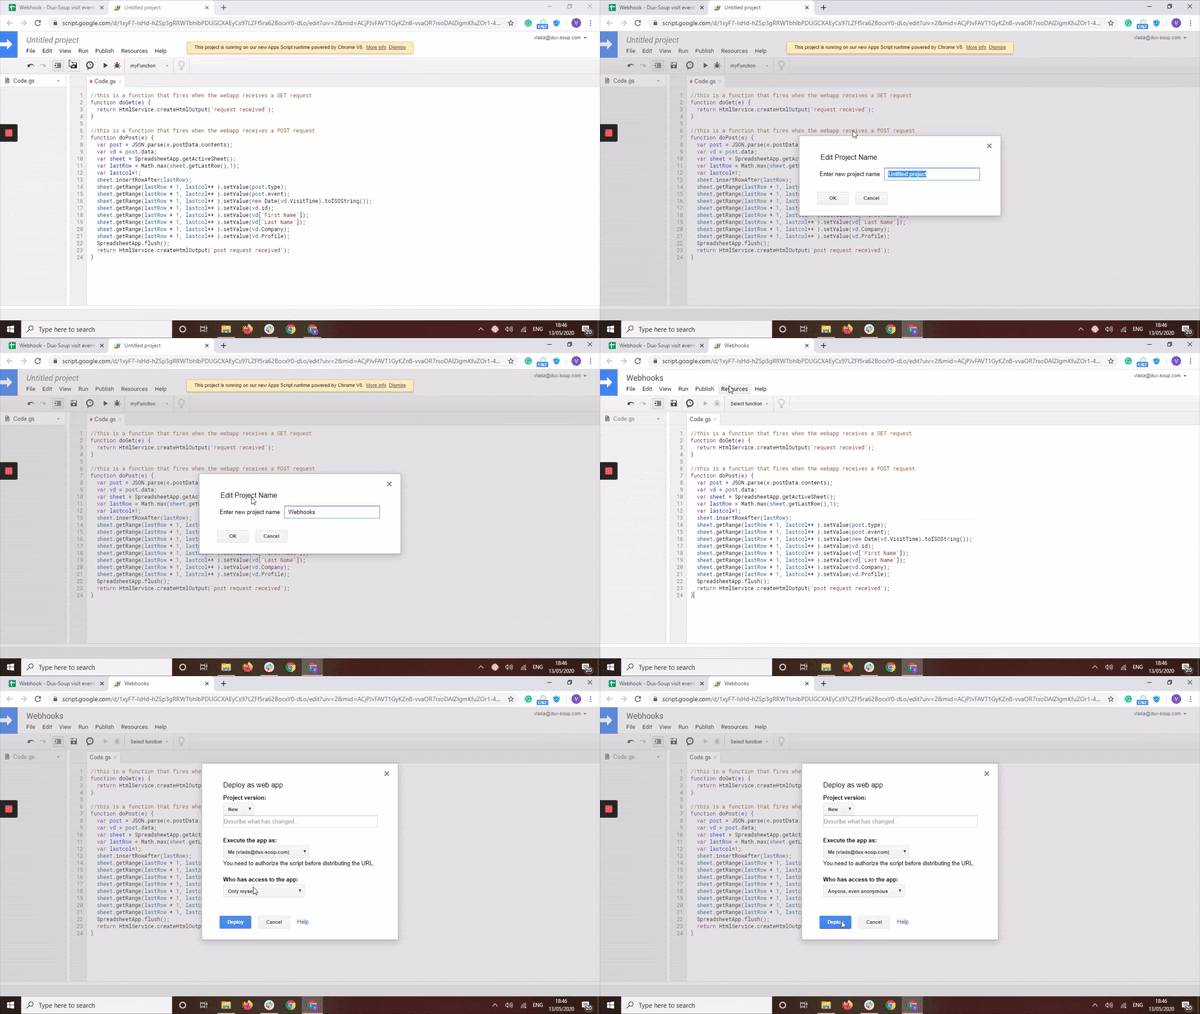
3. Paste the script from below into the script code editor and click on the Save button:
//this is a function that fires when the webapp receives a GET request
function doGet(e) {
return HtmlService.createHtmlOutput('request received');
}
//this is a function that fires when the webapp receives a POST request
function doPost(e) {
var post = JSON.parse(e.postData.contents);
var vd = post.data;
var sheet = SpreadsheetApp.getActiveSheet();
var lastRow = Math.max(sheet.getLastRow(),1);
var lastcol=1;
sheet.insertRowAfter(lastRow);
sheet.getRange(lastRow + 1, lastcol++ ).setValue(post.type);
sheet.getRange(lastRow + 1, lastcol++ ).setValue(post.event);
sheet.getRange(lastRow + 1, lastcol++ ).setValue(new Date(vd.VisitTime).toISOString());
sheet.getRange(lastRow + 1, lastcol++ ).setValue(vd.id);
sheet.getRange(lastRow + 1, lastcol++ ).setValue(vd['First Name']);
sheet.getRange(lastRow + 1, lastcol++ ).setValue(vd['Last Name']);
sheet.getRange(lastRow + 1, lastcol++ ).setValue(vd.Company);
sheet.getRange(lastRow + 1, lastcol++ ).setValue(vd.Profile);
SpreadsheetApp.flush();
return HtmlService.createHtmlOutput('post request received');
}
4. From the Publish menu, select Deploy as a Web app.
5. Select to execute the app as Me, and allow Anyone, even anonymous to execute the script.
6. Then, click Deploy.

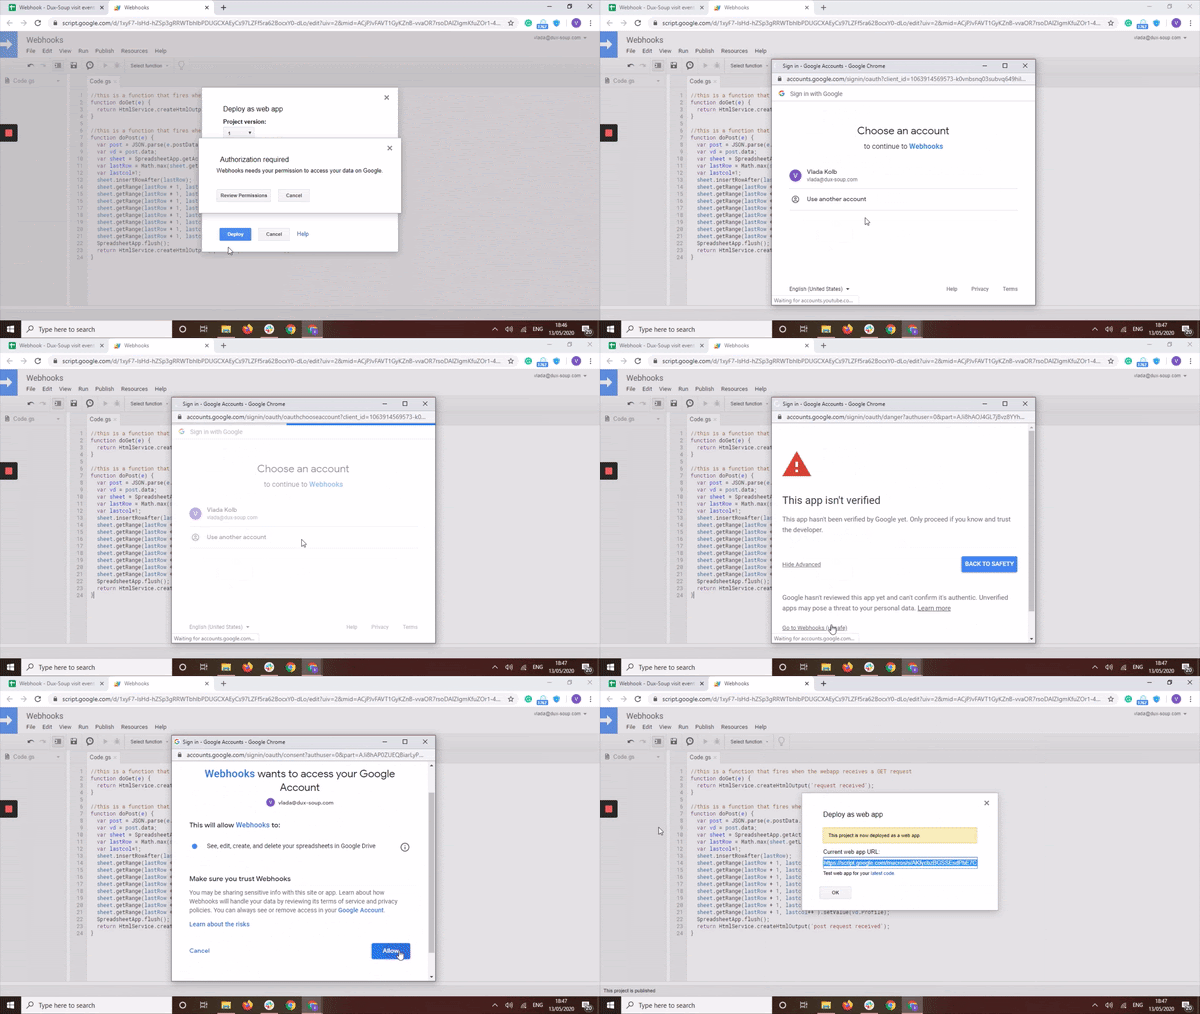
7. You will be asked to review permissions now. Click on Review Permissions and select your account. Then, choose Advanced and Go to the Webhooks, click Allow:

8. The URL that you get will be the webhook URL that you need to copy and paste to the Dux-Soup Options, Connect tab.
9. Afterwards, click on “Send Sample”:

You should now be able to see a cell in your spreadsheet populate. You can name the 1st row the following way, however, it’s up to you how to name these columns:

Summary
In this blog, we have shown you how to catch the visit webhook directly from Dux-Soup in Google Sheets. It’s worth mentioning that Dux-Soup can execute 5 different events such as Visit, Scan, Action, Message and Remote Control. Find more details here. However, adjusting the code provided in this blog in order to catch a different type of webhook, would require some basic programming skills.
You can join our Facebook Group to ask for a piece of advice from other members. There are so many great minds out there who are willing to help!
If something was unclear or you have any questions, let us know at info@dux-soup.com and we’ll be more than glad to help you out!


