How to Revisit Data with Dux-Soup
You've spent precious time building a targeted database - and now it's time to 'revisit' that data.
It’s a topic that loads of you have been asking about recently so, in this blog, we’ll take you step by step through the “Revisit Data” process.
When should I use the Dux-Soup Revisit Data function?
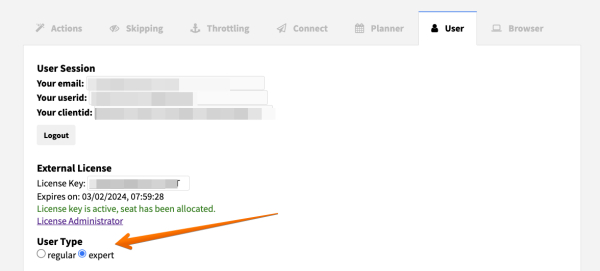
This blog demonstrates "Expert Settings" that you can easily enable in the Options menu, under the User tab.
In our recent LinkedIn and Dux-Soup search and filtering masterclass, we showed you how to use LinkedIn search to find the right data.
But, what if there are still some profiles on the list that you don’t want to engage with? Of course you can always blacklist a few profiles - in order to remove them from the automated actions loop - but your search can often have more than a few “unwanted” profiles.
In this case, the best way is to scan profiles first and use the Dux-Soup Revisit Data function for further engagement.
Here are some examples when you should use the Dux-Soup Revisit Data tool instead of a regular search on LinkedIn:
Messaging 1st-degree connections. Your list of 1st-degree connections might contain friends, colleagues and other people who you don’t want to approach with Dux-Soup. So, what is the best way to message your existing connections? By scanning all of your 1st-degree connections, deleting unwanted profiles and uploading the list back to Dux-Soup. We’ll come back to this process in more detail later in the blog.
Using Dux-Soup points. As you might already know, any paid Dux-Soup version (Pro or Turbo editions) can scrape the email addresses of your 1st-degree connections. If you want to capture the emails for your 2nd and 3rd-degree connections, you can purchase Dux-Soup Points. The Revisit Data tool will give every point you spend added value, as you can clearly define what profiles you want to visit and scrape emails from.
Custom Message Markers. The Dux-Soup Revisit Data tool enables custom message fields which is a powerful option. With this, you can add words, like Mr. or Mrs., specific to each target profile to be used in the connection request or direct message.
Scanning LinkedIn profile list
While the Dux-Soup “Visit Profiles” option is the main function of the bot (as all automated actions are executed during automated profile visits on LinkedIn), the “Scan Profiles” option is definitely a handy tool when it comes to revisiting data with Dux-Soup. Find out the difference between scanning and visiting LinkedIn profiles.
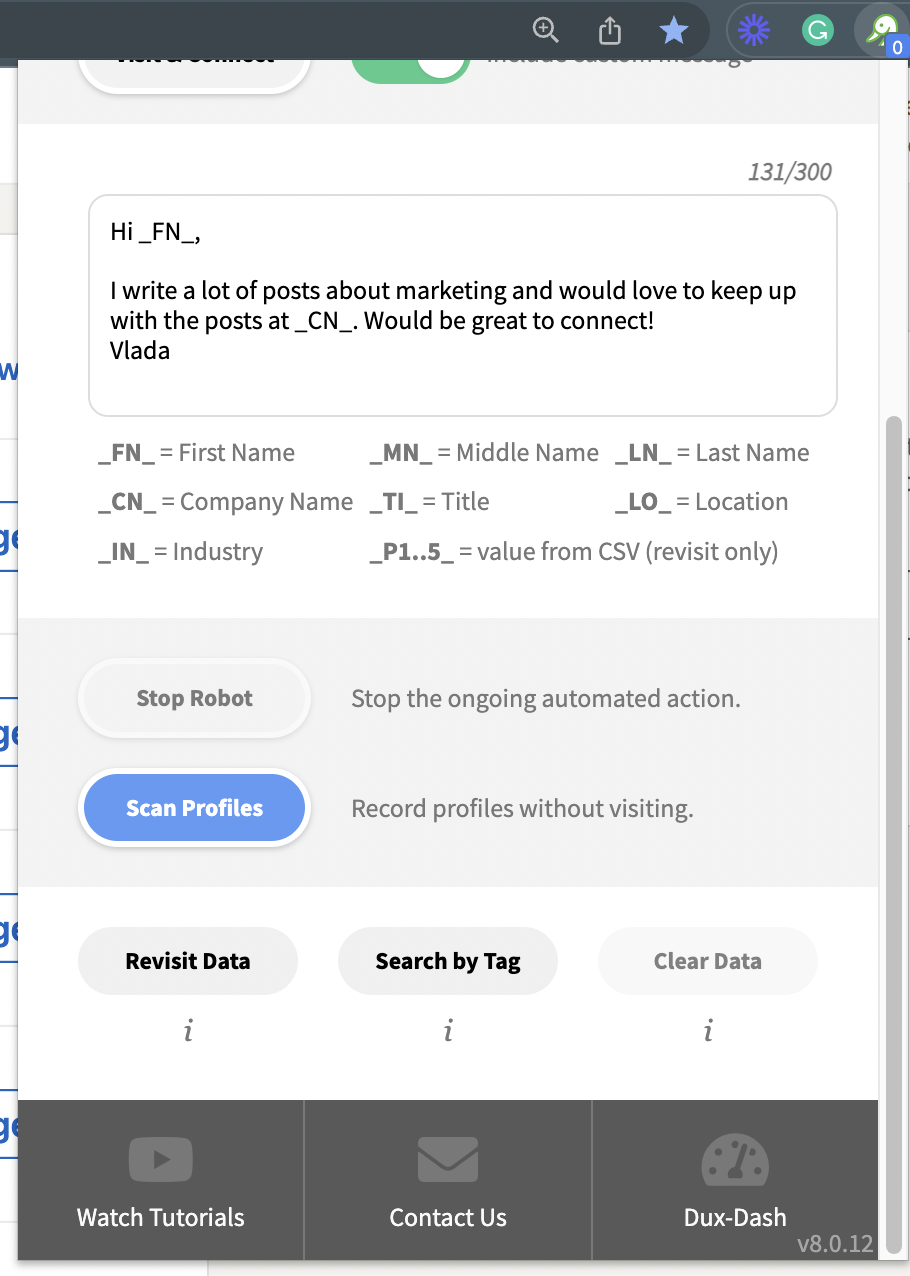
The Dux-Soup “Scan Profiles” function is a quick option to retrieve data from the profile - such as first name, last name, title, location and, most importantly, the profile’s URL. If you have a LinkedIn profile’s URL, you can revisit this profile later on with Dux-Soup.
The scan data is available for download separately from the visit data:
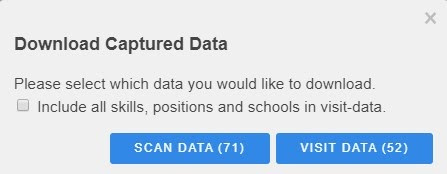
You can scan 6 pages per minute on average and there is no limit to how many profiles you can scan per day. Super cool!
Revisiting 1st-degree connections
You can use the Dux-Soup Revisit data tool for your 1st-degree connections for many reasons. For example; auto-tag profiles, sending a direct message, endorsing, etc. To begin with, you need to create a CSV file that you can upload back to Dux-Soup. The quickest way to create this file is to scan your connections.
To access your 1st-degree contacts, you can:
a) Load up a list of your 1st-degree connection by clicking on the link here.
b) Go to "My Network" on LinkedIn and click to "See All" - this will load up a list of your connections.

c) You can also filter your 1st-degree connections first in your LinkedIn search. Click on the search field on the top of the page and click to look for "People".

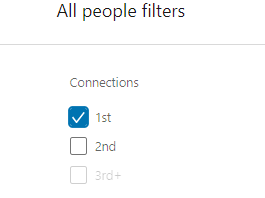
Now apply the filters and make sure you select "1st connections", then click "Apply".
Once you have located your 1st-degree connections, all you then have to do is click on the Dux-Soup icon in the top right corner of your browser and select “Scan Profiles”.
After Dux-Soup has finished its work, download the file and edit it according to your needs.

Also, it’s a good practice to import the CSV file into Excel in case your file contains special characters. To do that, follow these steps:
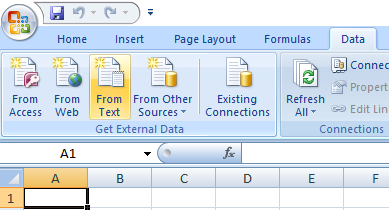
- open Excel, click the cell where you want to import the data from a .csv
- on the Data tab, in the Get External Data group, click From Text
- browse for the csv file you want to import, select it and click the Import button
- make sure that you have selected UTF-8 as the file origin:

- click Next and select Comma in Delimiters section,
- select Next and Finish,
- press OK at the end of the process.
Then, open your browser, click on the Dux-Soup icon and select the Revisit Data option:
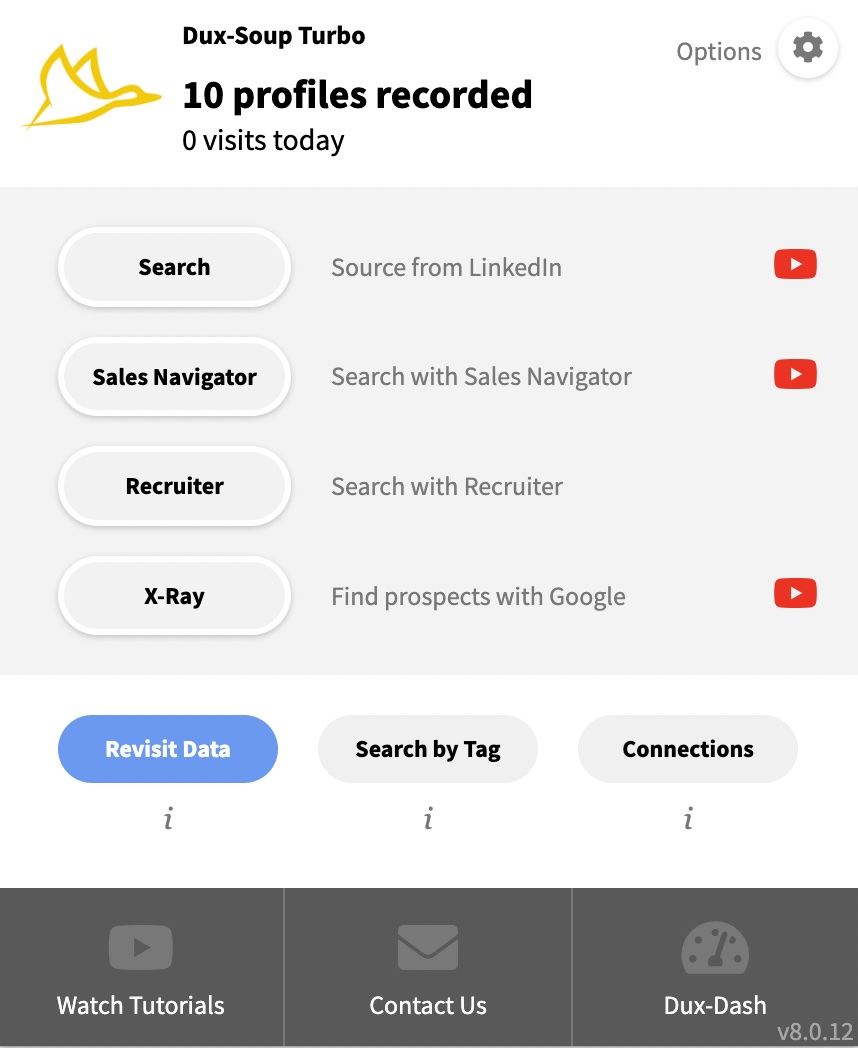
You will now see the Dux-Soup Revisit Data tool in front of you. Drop the file or select the file’s path, and wait for it to upload. It’s all ready. You can now enable an action set to be applied to this specific list of profiles. Watch this process in action here.
Revisiting 2nd and 3rd-degree connections
Revisiting 2nd and 3rd-degree connections is pretty much the same process as above - but you need to follow different steps to create your revisit file.
The LinkedIn platform allows you to specify search terms for specific fields as the contact data is structured in a specific format.
You can filter your search results on LinkedIn by clicking on the “All Filters” section after you have made the search in the header of the LinkedIn website.
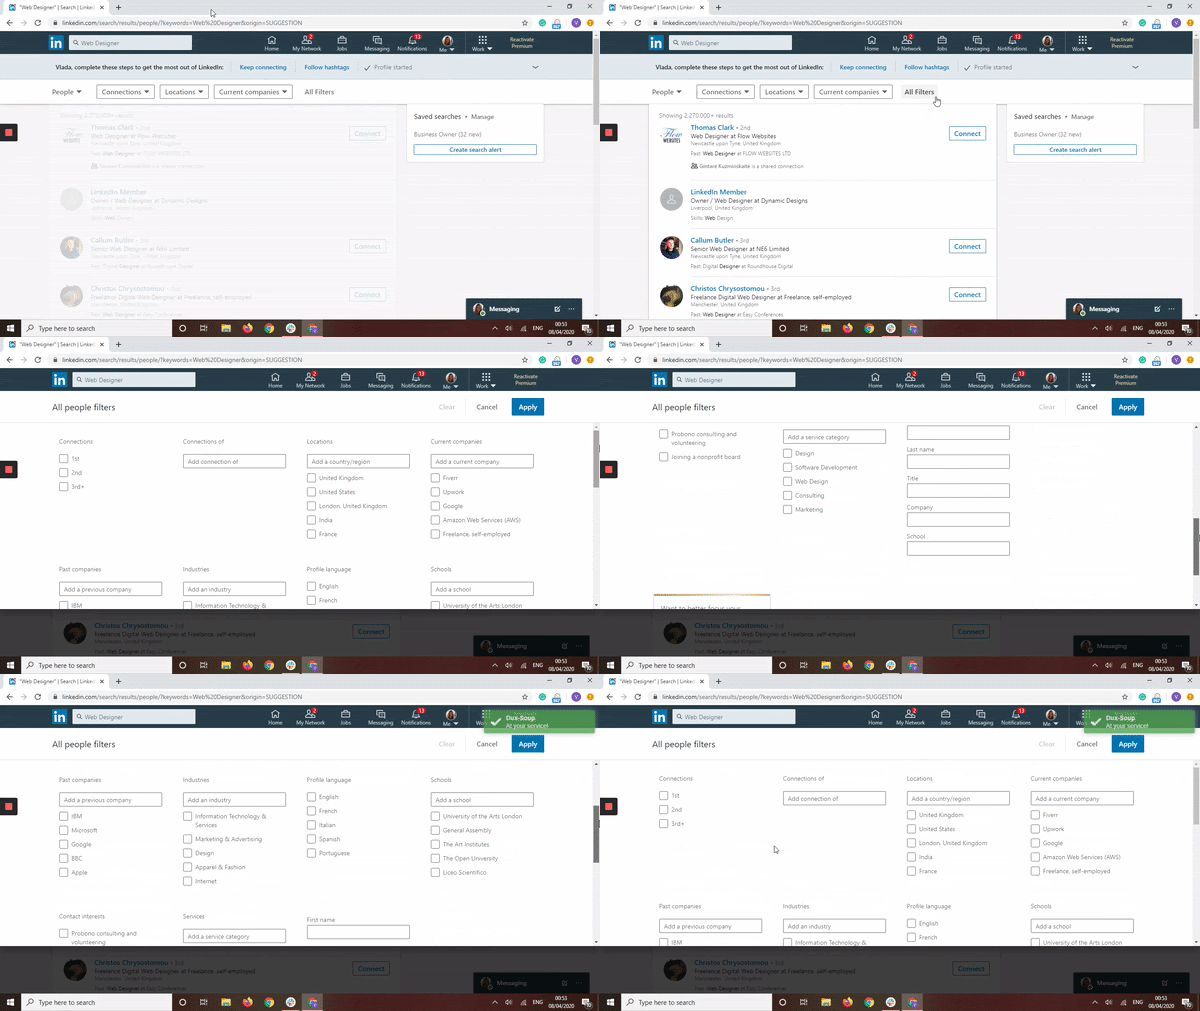
Once you click on the “All Filters”, you'll see the following search fields:
- Connections of
- Locations
- Current companies
- Past companies
- Industries
- Profile language
- Schools
- Contact interests
- Services
- First name, Last name, Title, Company, School
LinkedIn Premium search filters (LinkedIn Recruiter and Sales Navigator) include additional filter options such as Years of Experience; Function; Seniority Level; Company Size and When Joined.
Also, it’s worth mentioning that LinkedIn search filters support the Boolean expression. Boolean search will work in the Company, Title, and Keyword fields in Sales Navigator. Find more about the Boolean magic here.
Tip: When you use the Revisit Data tool, it’s worth considering the auto-tagging option (Dux-Soup Options → Actions tab). This option enables you to come back to this list of profiles any time by using the Dux-Soup Search by Tag tool.
Custom files
If you are new to Dux-Soup and you already have a list of contacts you wish to engage with, we’ve got good news for you!
You can approach profiles automatically with Dux-Soup if you have their LinkedIn profile URLs.
Dux-Soup only recognizes a certain format so, in order to work, you need to make sure your document contains these 3 columns, with these exact (case sensitive) column headings:
- Profile (LinkedIn URL)
- First Name
- Last Name

A few things to note:
- Make sure your file does not contain any empty rows or columns
- Ensure that the headings Profile, First Name and Last Name columns start with capital letters
- It does not matter if the links are obtained from Standard LinkedIn or Sales Navigator, Dux-Soup will recognize them both
- If you don’t have the first or last names you can use dummy values, e.g. ‘-’. Just make sure the columns have some data.
- The URL must contain https://www in the front.
Custom fields and gender specificity
You might want to include name prefixes such as Ms. or Mr. when approaching your audience. Unfortunately, when a person signs up to LinkedIn for the very first time, there is no field to mark gender so it is not possible to get this information - even if you don’t use Dux-Soup.
You can use 2 ways to get around this: 1) adding custom fields in your CSV file; 2) using external programs such as gender-api.com.
1) Adding custom fields to your CSV file. It’s possible to add custom fields to connection request messages, direct messages and InMail messages sent by Dux-Soup if you add additional columns P1 to P5 in the CSV revisit file.
Dux-Soup custom fields make this possible. You can simply add the columns to the CSV using the heading P1 (up to P5):

Secondly, add the placeholder to the message template in Dux-Soup Options:

Once you upload the file to the Dux-Soup Revisit data tool it should look like this:
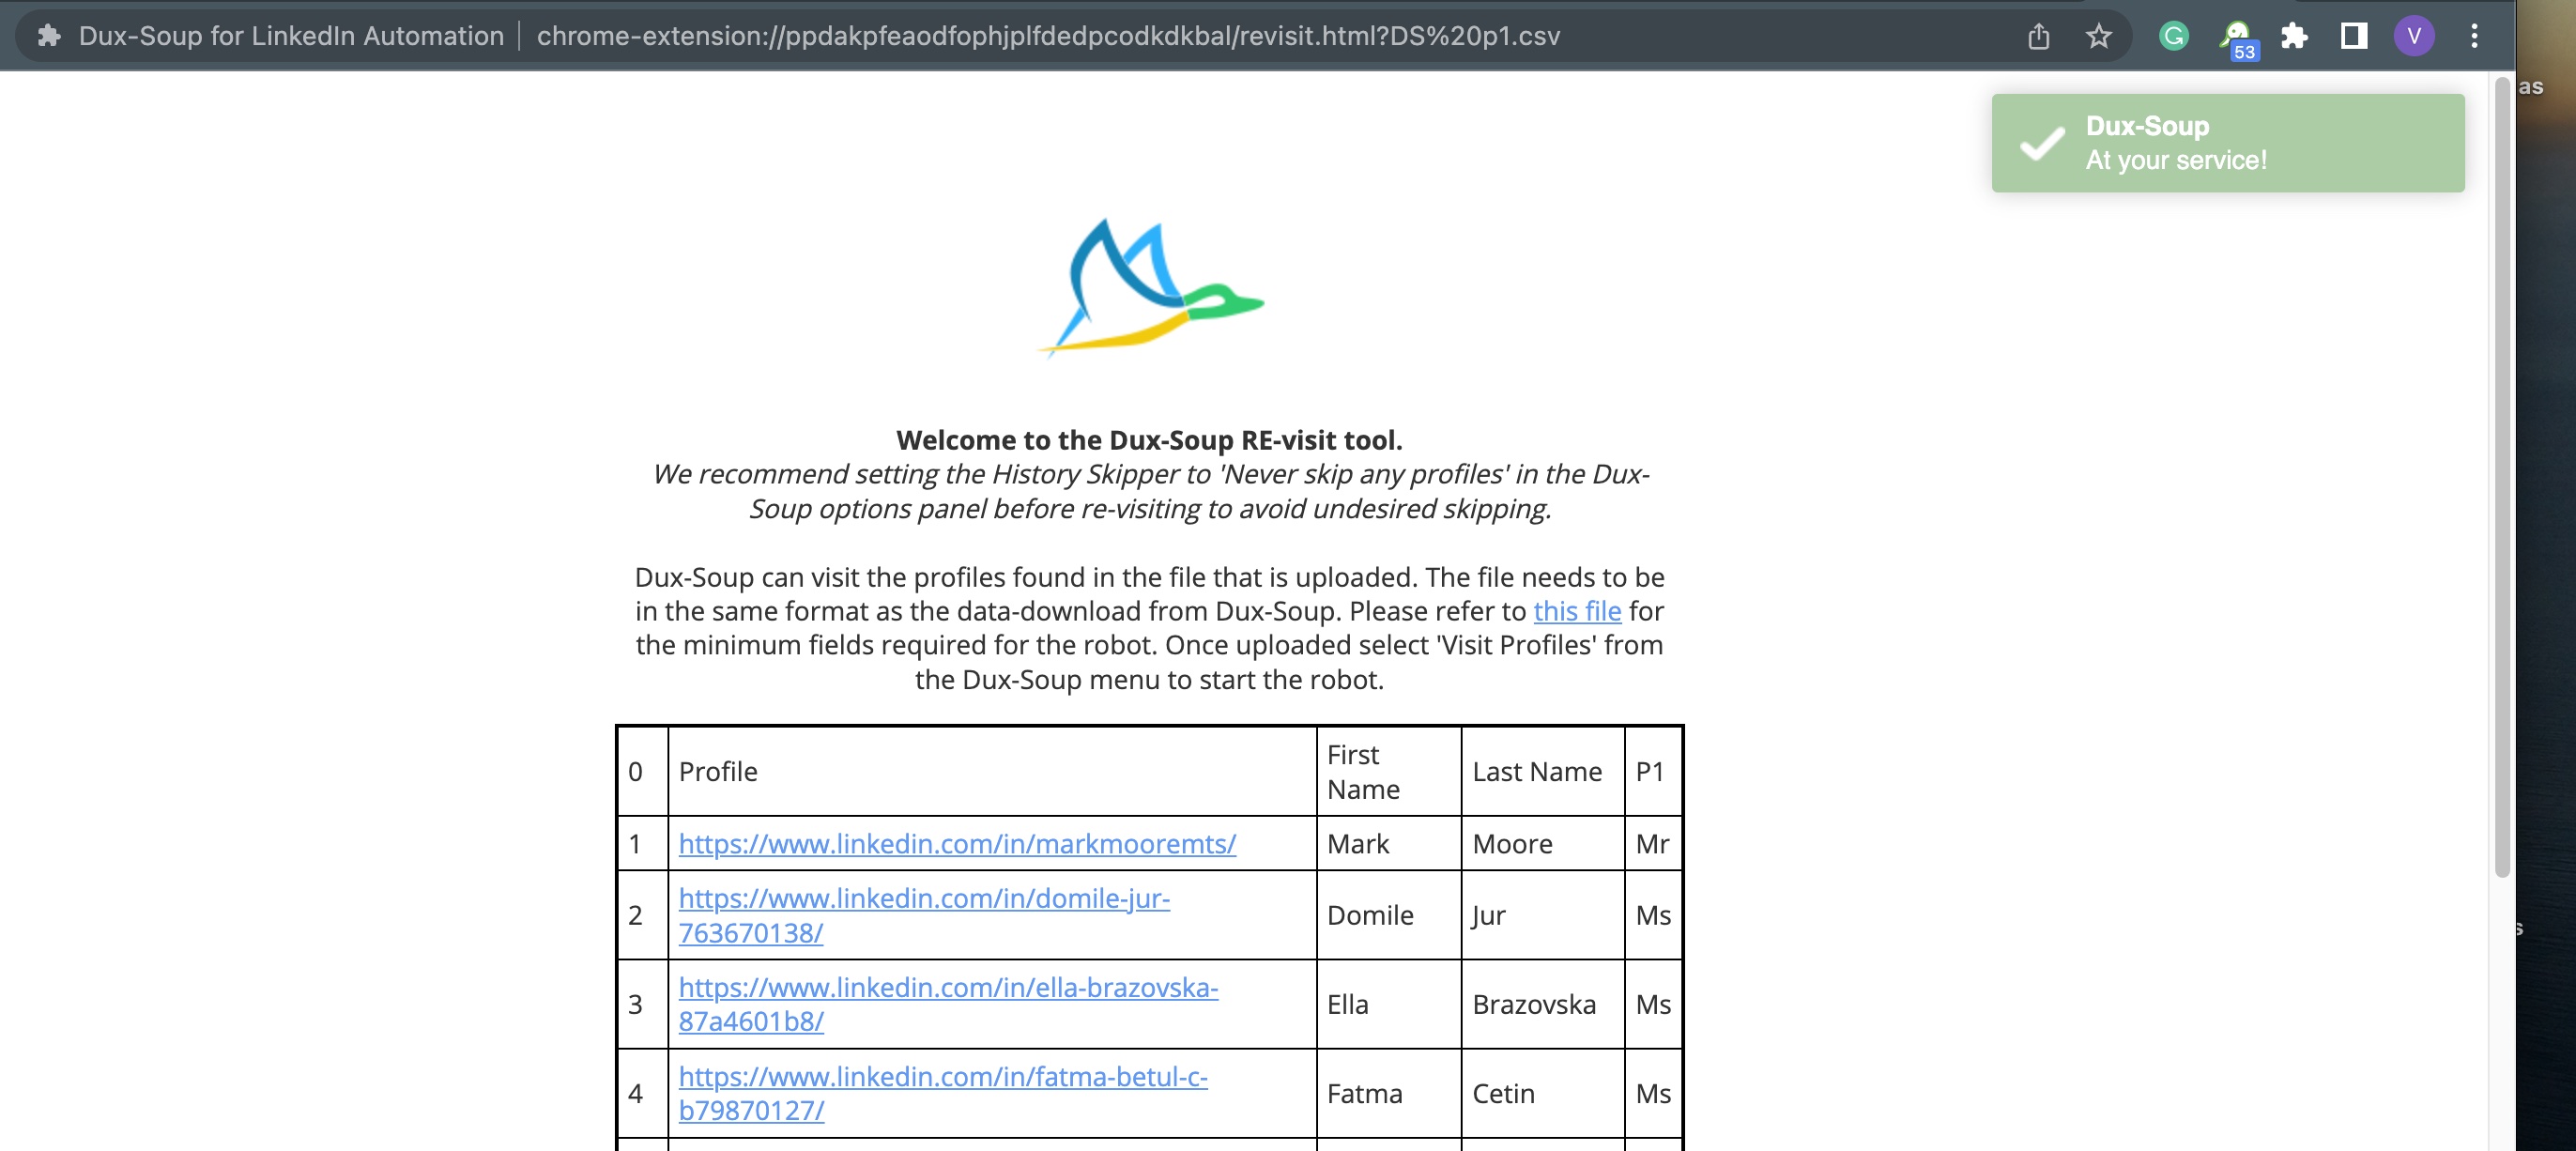
Now, when Dux-Soup sends the message, it will use the values from the CSV for the placeholders.
2) Using external programs such as gender-api.com. This way is less time consuming as the app will determine the gender automatically. Follow this link and create an account (they offer a free trial) - you can then upload your Dux-Soup scanned CSV file and gender-api.com will populate your file with gender, accuracy and sample columns (K-M).
Then, you can download your file and add another custom field (C column) to your spreadsheet and name it as P1. Also, don’t forget to create a sample text for the C1 column value; we’ve placed it in P4-P5 positions (marked with yellow in the picture below).
Finally, use “=IF(K2="male",$P$4,$P$5)” formula in C column - this means if gender is male use prefix Mr, otherwise use Ms.

That’s it, your file is ready to be uploaded to the Dux-Soup Revisit Data function!
Watch our webinar recording to learn more
Watch our webinar recording to learn more about Dux-Soup's Revisit Data Tool. Giles Garnett, Head of Professional Services and Gin Kuzminskaitė, Head of Customer Support will take you to step by step through the Revisit Data process - addressing things like:
- Message markers and personalisation
- Gender specificity
- Safe limits, and more!
Summary
Using the Dux-Soup Revisit Data tool ensures that the people you are connecting with are within your target audience and relevant for you. In this way, every Dux-Soup visit can bring you real value and boost your lead generation.
If you're not already a Dux user, then give our free Dux-Soup trial a go - you get 14 days absolutely free and we don't even ask for any payment details.
Do you have any questions, comments or suggestions? We’d love to hear them so send them over to info@dux-soup.com and we’ll respond straight away!


