By now, you might have realised that Dux-Soup Turbo and Zapier get along rather well.
By integrating Dux-Soup Turbo with an external app on Zapier (via Webhooks) the possibilities of lead generation automation are endless.
Webhooks act as a link between two systems so you can now import all your Dux-Soup Turbo information to your other applications.
This saves you lots of valuable time and makes the automation process much more productive. You can set up a Webhook, connect it with your favourite CRM (HubSpot, for example) and watch the data seamlessly synchronize in the background - while you continue working.
If you’re not a fan of CRM systems and prefer to interact with your data in real-time on a Google Sheets file - you can transfer LinkedIn profile data straight to your spreadsheet.
Note: you must be a Dux-Soup Turbo user for this to work.
If that’s the case and you have followed the steps to set-up Webhook integrations, here’s what to do next:
1. Adding Google Sheets
Once you name your Zap and your Webhook Trigger is all set-up, we want to make sure it integrates with Google Sheets correctly.
But before connecting, first, add a filter so that Zapier knows when to proceed.
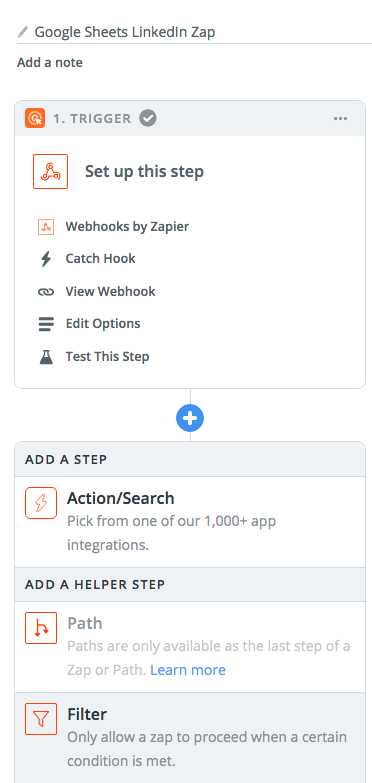
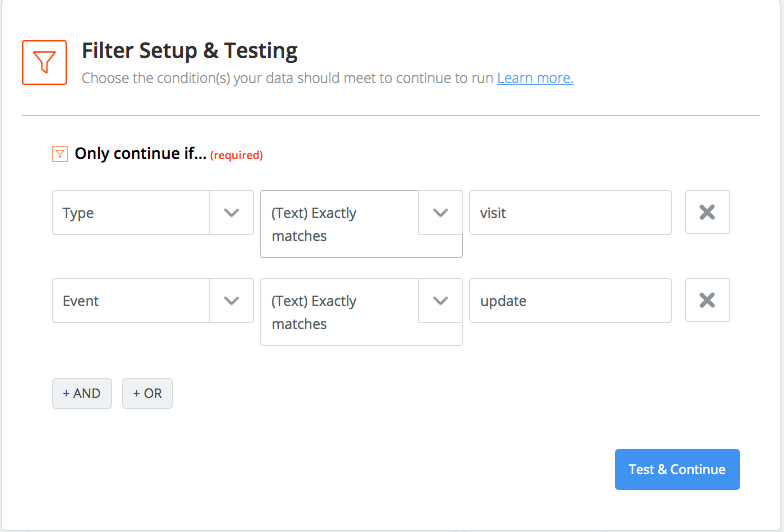
In this case, we want Zapier to check if the conditions are met, and then update your spreadsheet accordingly. So, this is what the filter should look like:
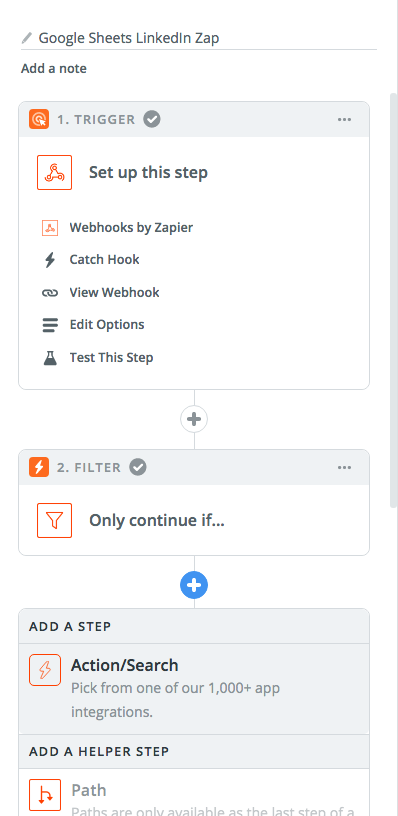
Now that that’s done, you need to connect Zapier to Google Sheets by adding the next step to be “Action/Search”:
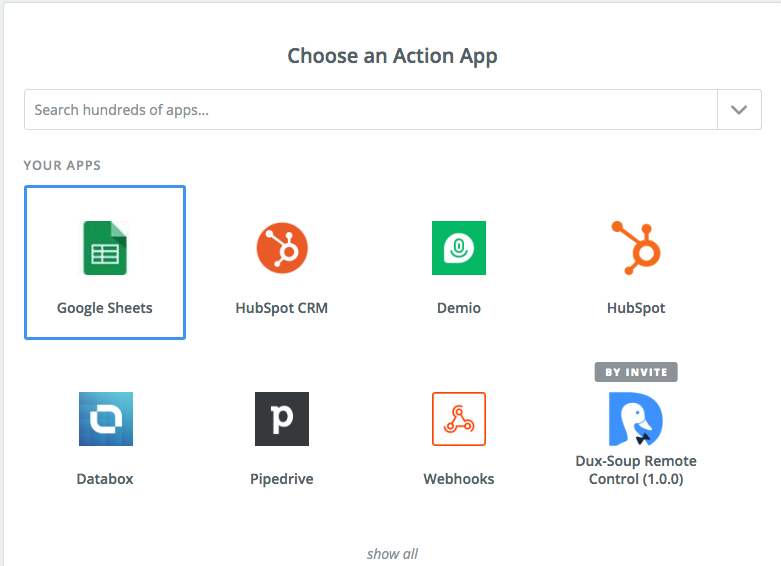
Then, select Google Sheets.
As we’re going to be adding LinkedIn information to the spreadsheet, we want to make sure it adds it on a new row each time. To do that, simply select “Create Spreadsheet Row” as per the example below:

2. Connecting Google Sheets
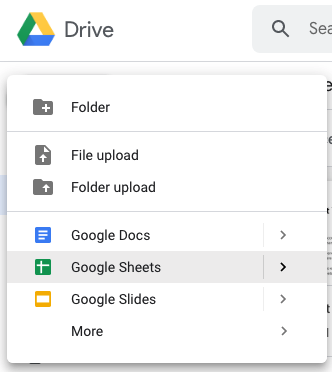
Now, before you move on, be sure to have a Google Spreadsheet ready that you’ll be connecting Dux-Soup Turbo to. To do that, navigate to Google Drive and create a blank Google Sheets file.
As an example for this article, we’ll be using this integration to export the following information to Google Sheets from LinkedIn. However, you can use other columns (e.g. Middle Name, Company, Phone and etc.):
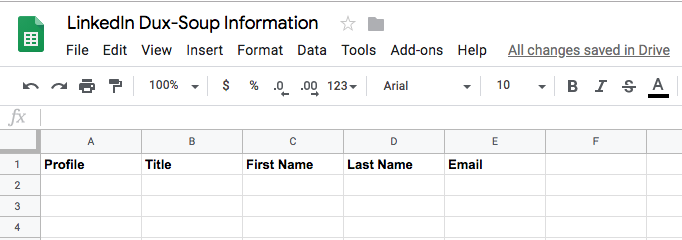
(Note: Dux-Soup Turbo will only extract the email if it can find it from their LinkedIn profile.)
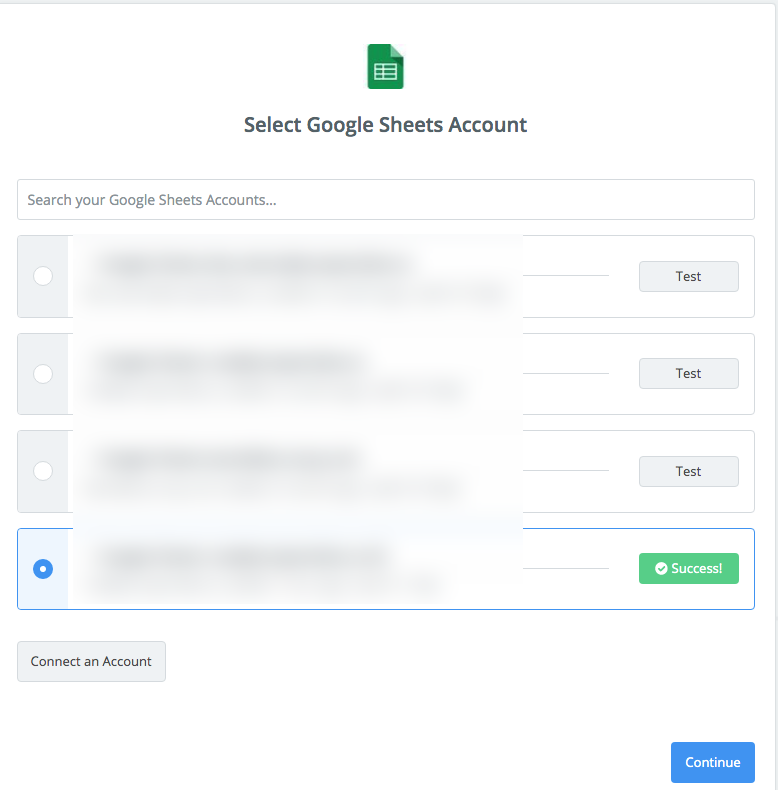
Now, go back to Dux-Soup Turbo and select the account you used to create the above file and click “Test” to make sure Zapier can see it.
3. Setting up Google Sheets
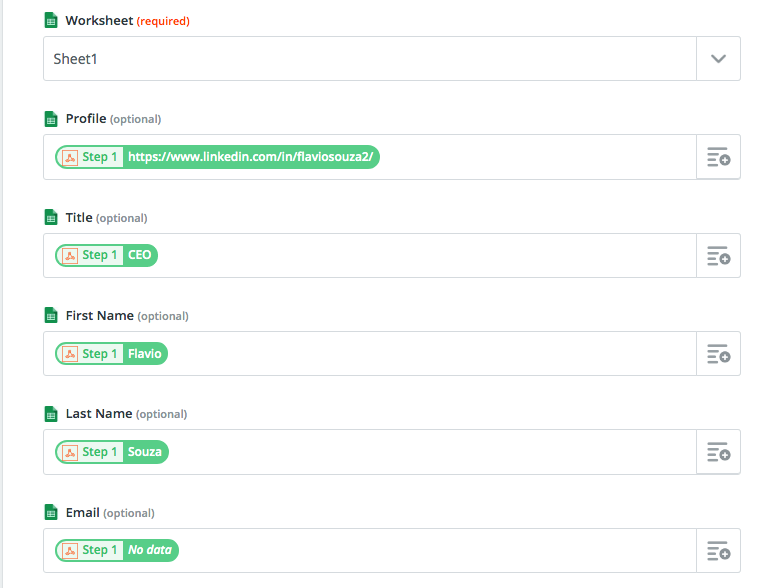
If you’ve been following the steps accurately, your setup preview should look something like this:
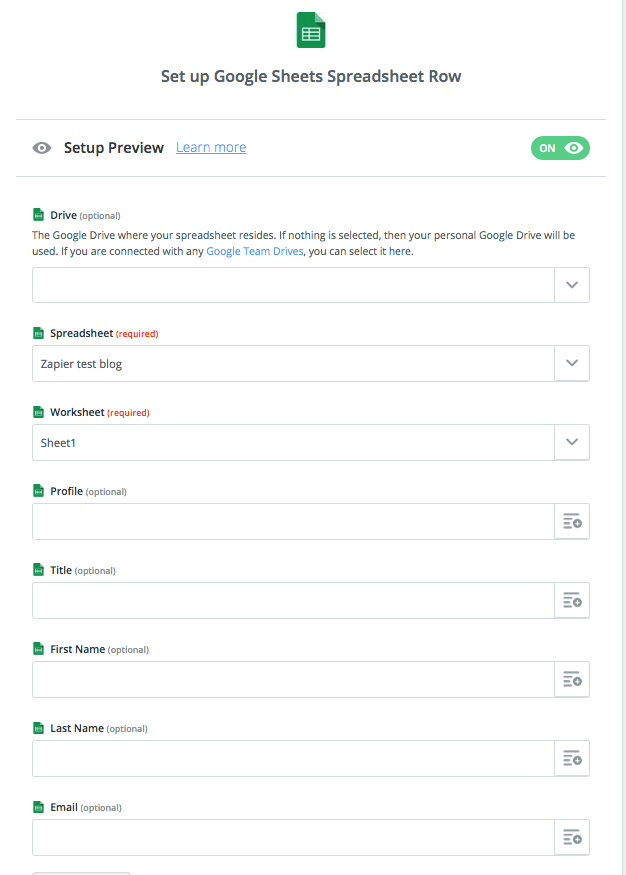
Now, fill in those empty spaces with the data so Zapier knows where to extract it from, like so -
If that’s the case, test this step again to make sure everything is correct.
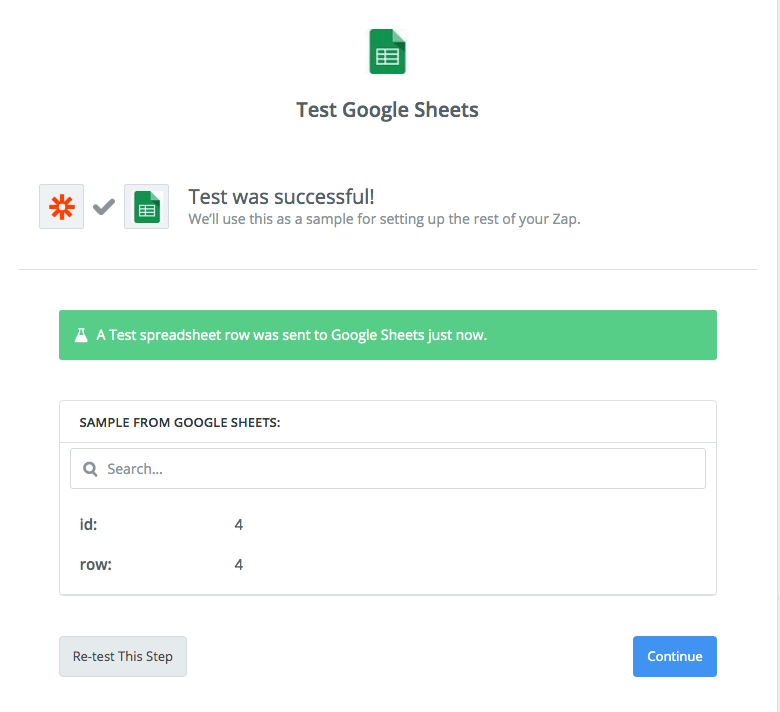
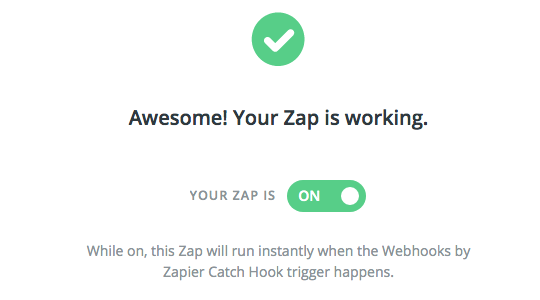
Once done, click “Continue” to make sure the Zap is on and proceed to the next step.
4. Capturing the data
Now that everything’s set up, all that’s left is collecting the data and pushing it to the Google Sheets file.
To do this, make sure you’re signed in the Dux-Soup extension and visit any profile you want to be added in your spreadsheet.

Once Dux-Soup Turbo captures the profile, it should then appear in the spreadsheet.
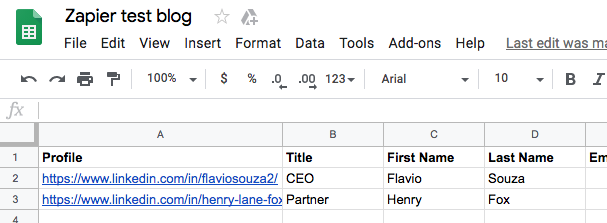
Visiting profiles is the most comprehensive way to get the data, and you can extract the following profile attributes:
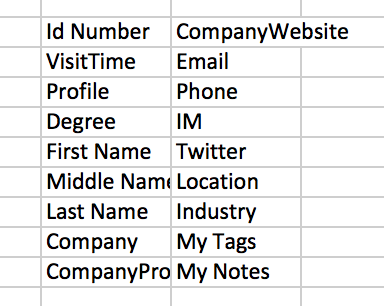
The good thing about having your data in a Google Sheets file is being able to filter and edit it in real-time based on your own set of criteria. To get a sense of how to do that, check out the full guide on how to export and filter your data with Dux-Soup.
Once you collect your contacts and want to set up an outreach campaign, simply download your Google Sheets as a CSV file.
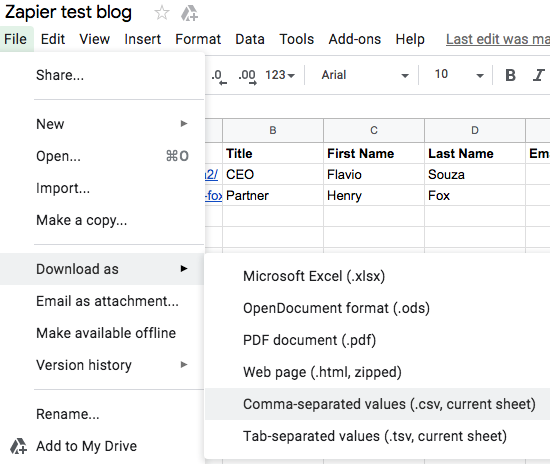
After that, you can revisit the data in Dux-Soup Turbo from the extension, like so:
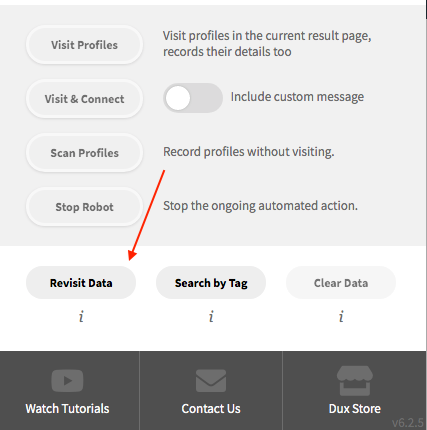
(Full guide on revisiting data here.)
To start your outreach campaign, be sure to enable the messaging feature by going to Dux-Soup Options > Actions tab, and prepare your connection message.
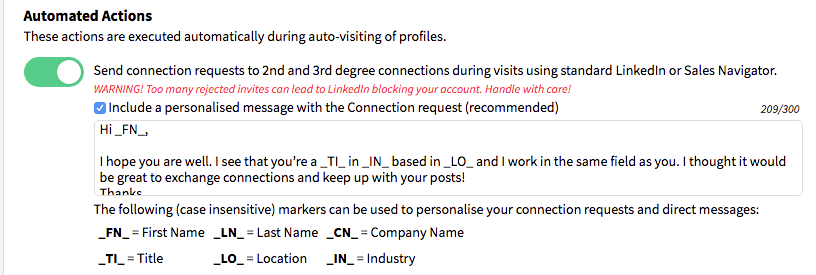
Then, go back to “Revisit Data” window where you’ve added your CSV file, click “Visit & Connect” on Dux-Soup menu and watch it get to work in the background.
That’s it! Setting up Dux-Soup Turbo to integrate with Google Sheets is as simple as that.
When it comes to handling and managing your data, you can customise it and manage it based on your preferences and who you want to target. If you want to learn more about the connection requests and how to set up a perfect template, be sure to also read our full guide on markers.
With that done, if you have any questions about Dux-Soup or thoughts for us, you can contact us at info@dux-soup.com and we’ll be glad to help!


