HubSpot is a marketing, sales, and customer service platform that helps companies grow better. It was founded on "inbound", the notion that people don't want to be interrupted by marketers or harassed by salespeople — they want to be helped. Today, the inbound movement continues to empower businesses around the world to stop interrupting, start helping, and return their focus to the customer.
Dux-Soup launched its integration with HubSpot in 2021, and it has since become our most popular integration. The integration allows HubSpot users to quickly and easily connect LinkedIn to their HubSpot CRM system, and harness the power of LinkedIn for lead generation across the business. Once the integration is installed, HubSpot users can:
- Automate LinkedIn outreach from within the Hubspot CRM system
- Build and enrich their Hubspot CRM data directly from LinkedIn
- Update HubSpot with LinkedIn connection requests & messages to offer a wider 360-degree customer view, and share information across the business.
In this blog, we’ll guide you through the Hubspot LinkedIn integration setup process (it really is very easy!) and walk you through all CRM features that Dux-Soup offers. If you don't already have a Dux account, it couldn't be simpler. Just install it using the button below.
So, let's read on!
To Integrate LinkedIn with Hubspot using the Dux-Soup integration, a Turbo or a Cloud license is required.
Installing the Dux-Soup Connector for Hubspot
To install the Hubspot CRM integration, first, log into your Hubspot CRM via https://app.hubspot.com/home and go to your Dux-Dash.
From the Dux-Dash, go to 'CRM connections' and click on 'New Connection', then choose Hubspot from the integrations list.
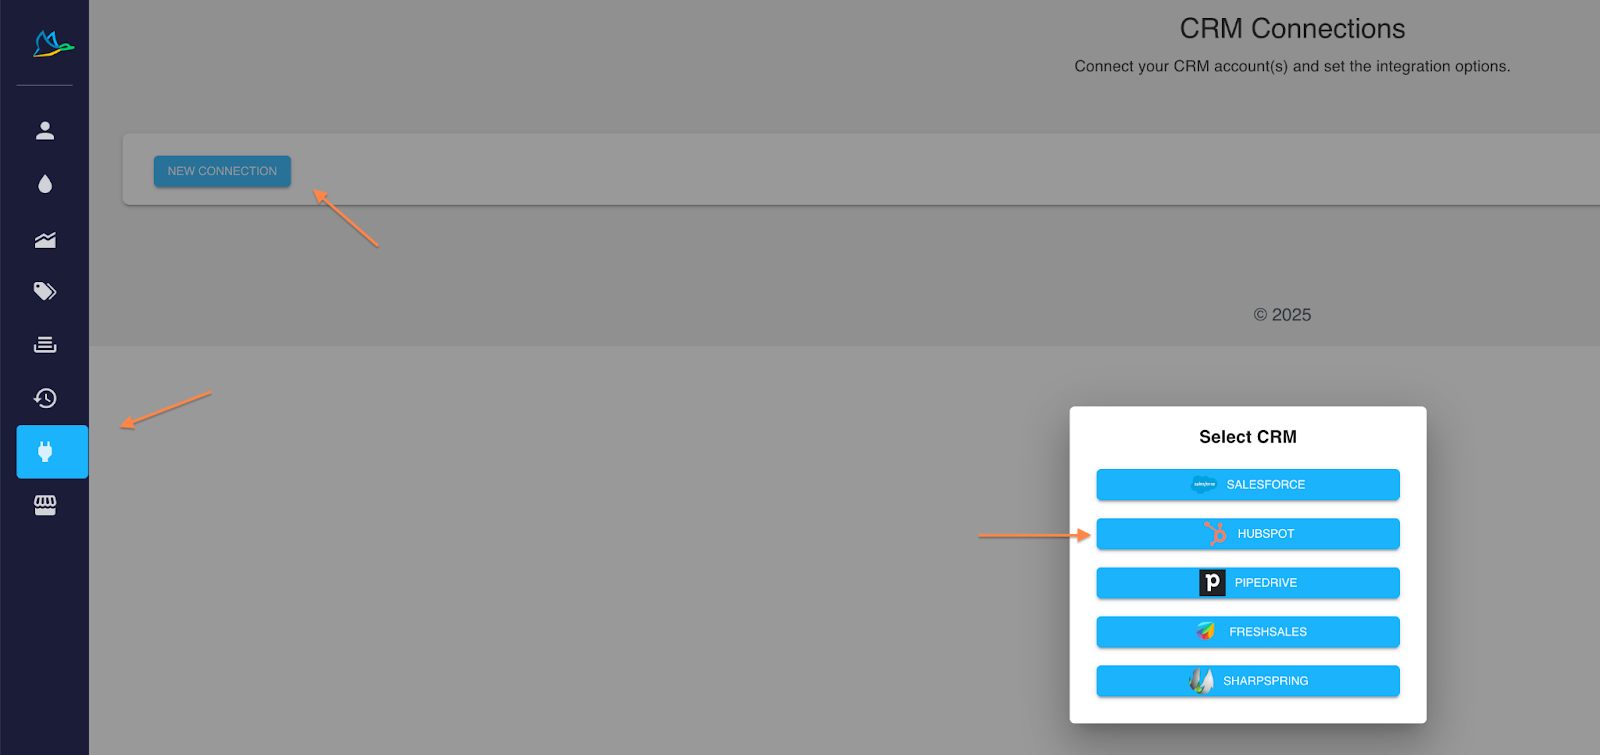
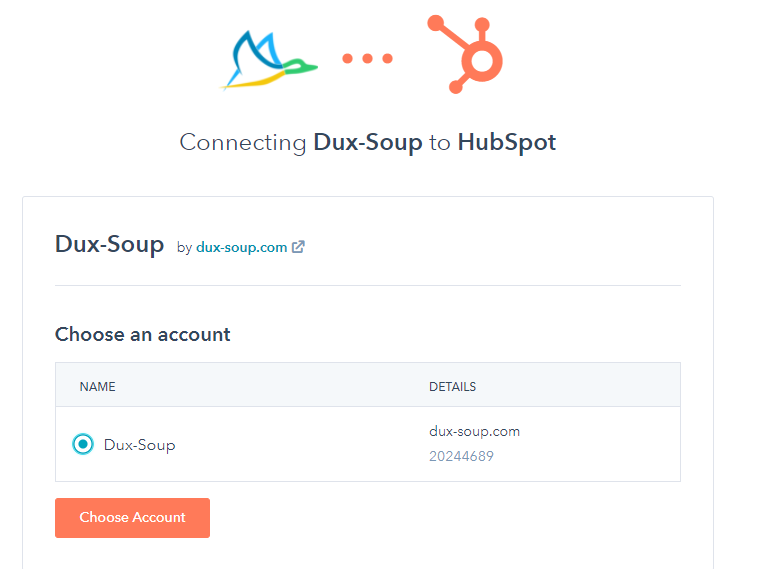
Select your HubSpot account and click on the 'Choose Account' button:
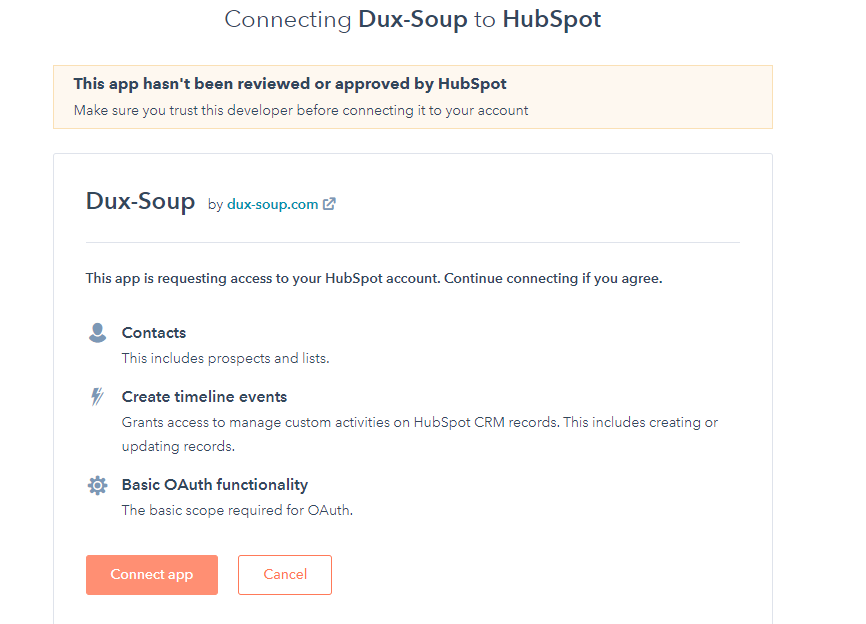
In the next window, select 'Connect app':
Your HubSpot connector will show up on the Dux-Dash connector list:
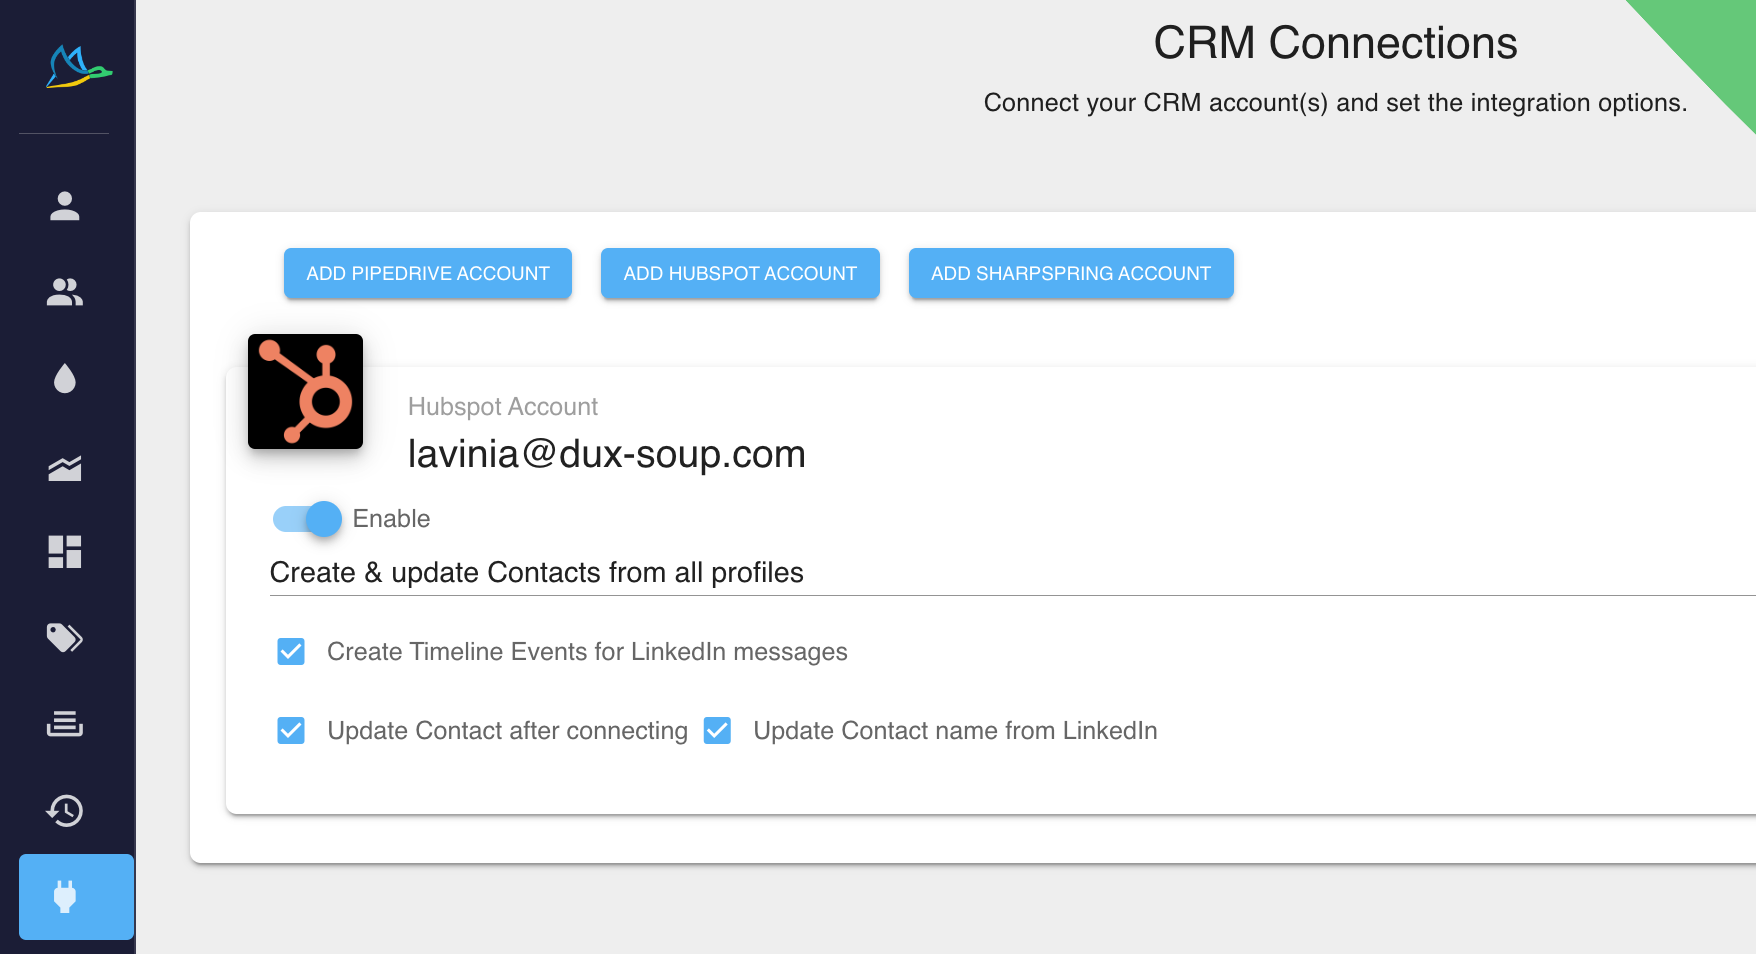
The Dux-Soup HubSpot Connector is now installed 🎉. That was easy, right?
Let’s take a closer look at what you can do now.
First of all, you can choose what LinkedIn profiles can be automatically added to your HubSpot CRM via Dux-Soup. Because you may not want everyone that Dux-Soup visits and records to end up in HubSpot, we've provided you with options here. You just need to select the one that fits you - we cover your options below.
Creating & updating your CRM contacts directly from LinkedIn
Once the connector is installed, you will see a drop-down menu with options to 'create & update' your Contacts:
✅ 'Do not create & update Contacts from profile views’ - Dux-Soup will not add prospects to your CRM when you are visiting profiles. However, it can still execute other commands, such as creating timeline events for LinkedIn messages or sending direct messages/connection requests from HubSpot.
Note: If a LinkedIn profile isn’t recorded in the HubSpot Contacts section, the timeline events won’t be updated.
✅ ‘Create & update Contacts from connected profiles’ - Dux-Soup will collect data and update your CRM with 1st-degree connections only. Very handy feature as you are likely to add those contacts that have email!
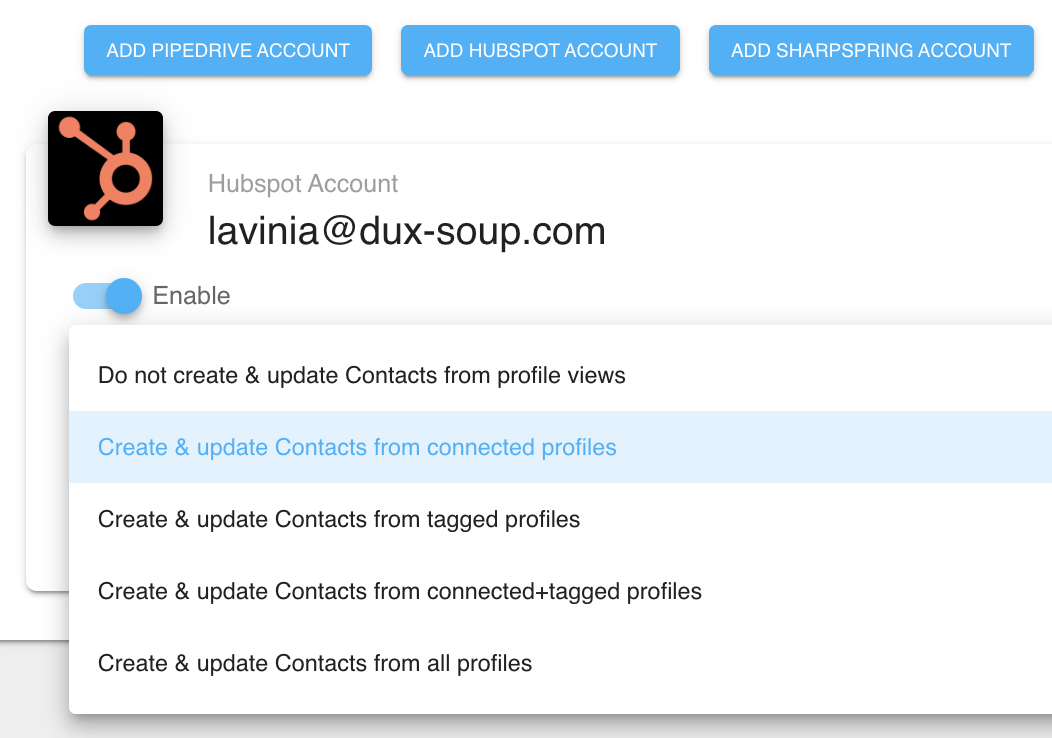
✅ 'Create & update Contacts from tagged profiles’ - You can set Dux-Soup to create a profile record in HubSpot only if the profile has a specific tag recorded:
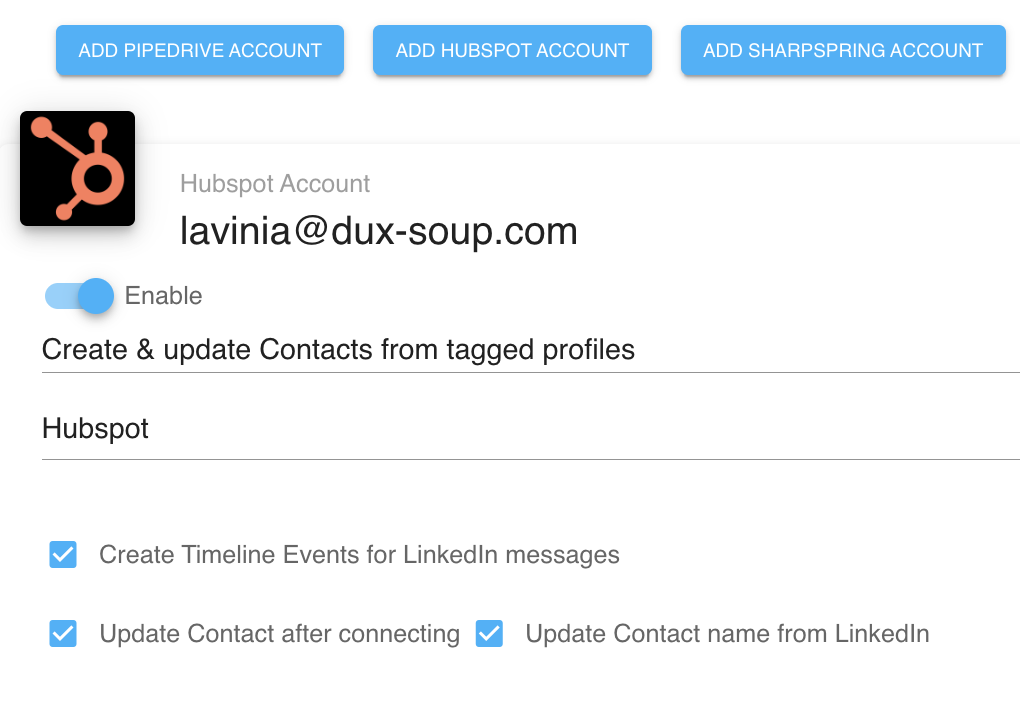
Learn more about the Dux-Soup tagging system.
✅ 'Create & update Contacts from connected+tagged profiles’ - You can set Dux to tag profiles with a specific tag when sending connection requests. Once they accept your invite and become 1st-degree connections, they will be added to your CRM if they also have the specified tag.
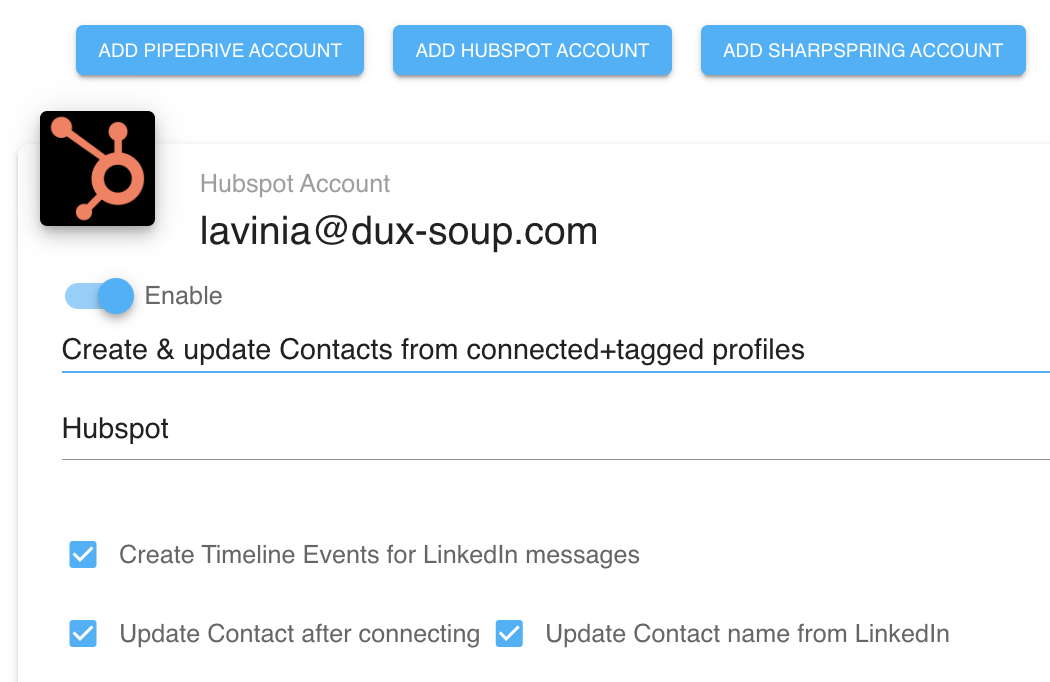
✅ ‘Create & update Contacts from all profiles’ - Dux-Soup will add all prospects to your CRM when you use Visit Profile or Visit & Connect functions.
Once you've decided which contacts you want to appear and update in HubSpot, let's look at what events and messages you want to automatically appear in HubSpot.
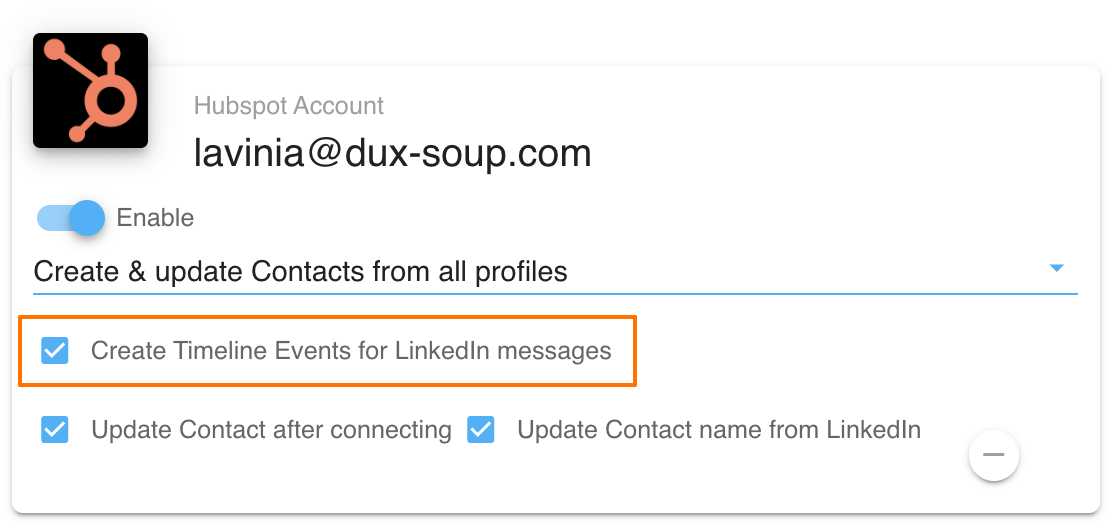
Creating timeline events for LinkedIn messages
Dux-Soup can create an event of your sent and received messages and add these to the profile’s activity timeline in HubSpot:
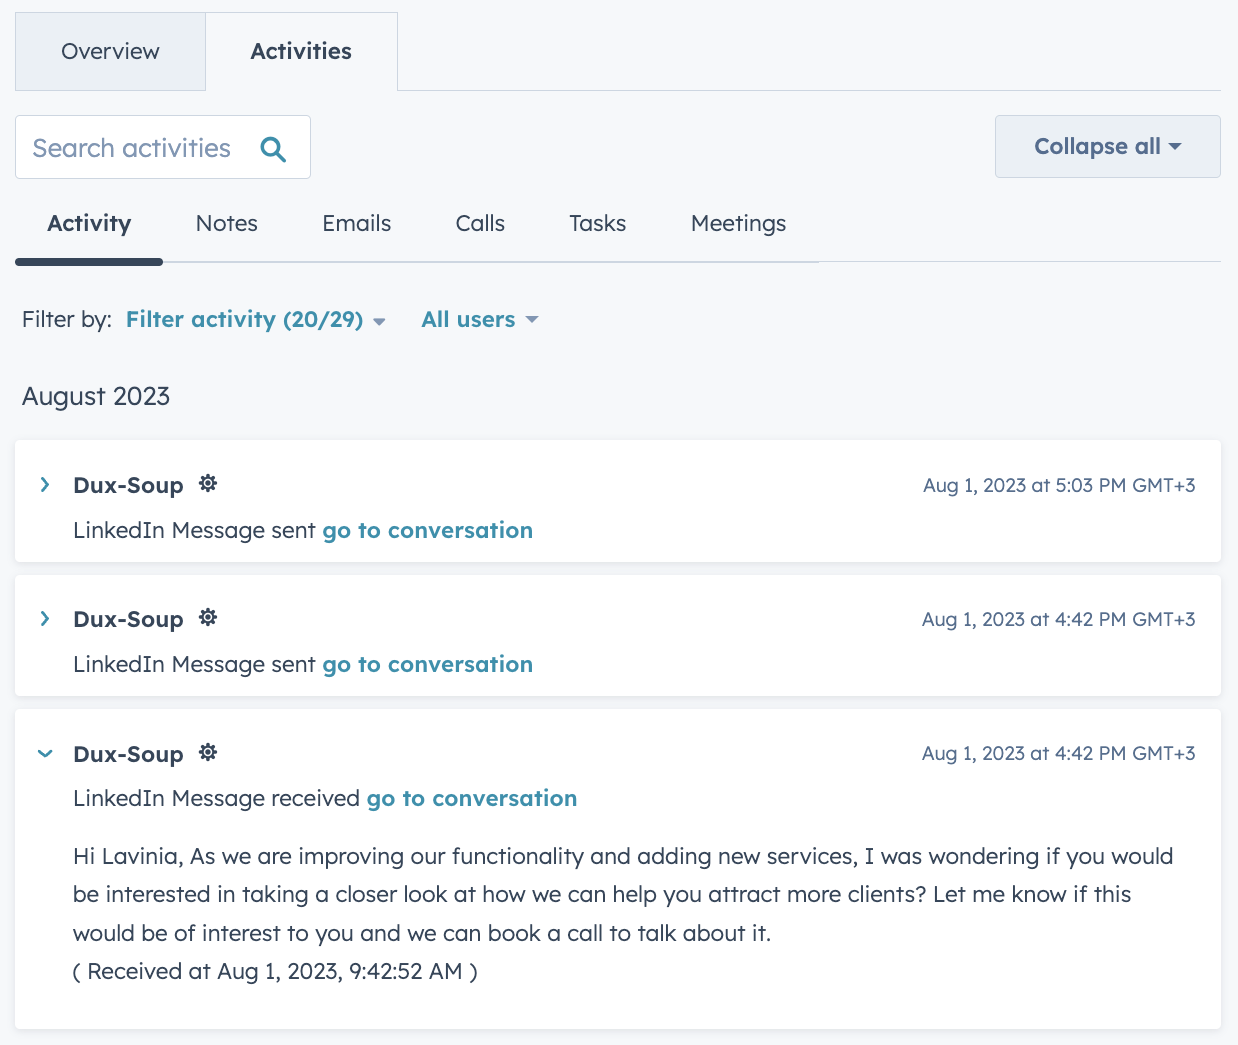
For these messages to appear, all that you have to do is to keep this option enabled in Dux-Dash CRM connections:
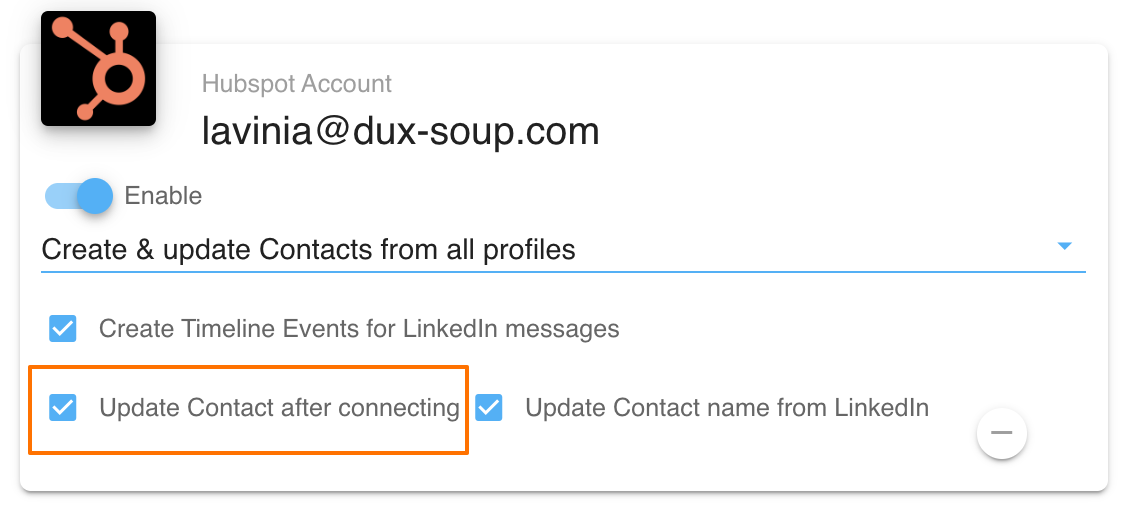
Updating contacts after connecting
In most cases, as you might already know, you can only see a prospect’s email address and send a direct message after they become a connection. Dux-Soup will automatically update the profile in HubSpot once they accept your connection request, enriching your data automatically for you. Just check the box shown below.
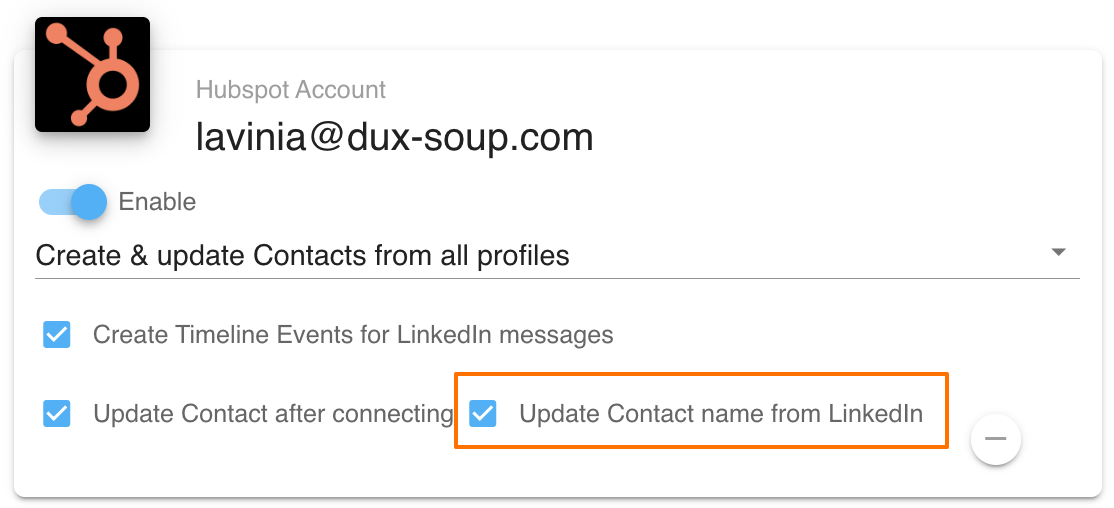
Updating contact names from LinkedIn
On LinkedIn, only your 1st-degree connections can see your full name, regardless of your settings. To keep your CRM contacts always up to date, enable this option if you want Dux-Soup to update the contact’s name in HubSpot from LinkedIn.
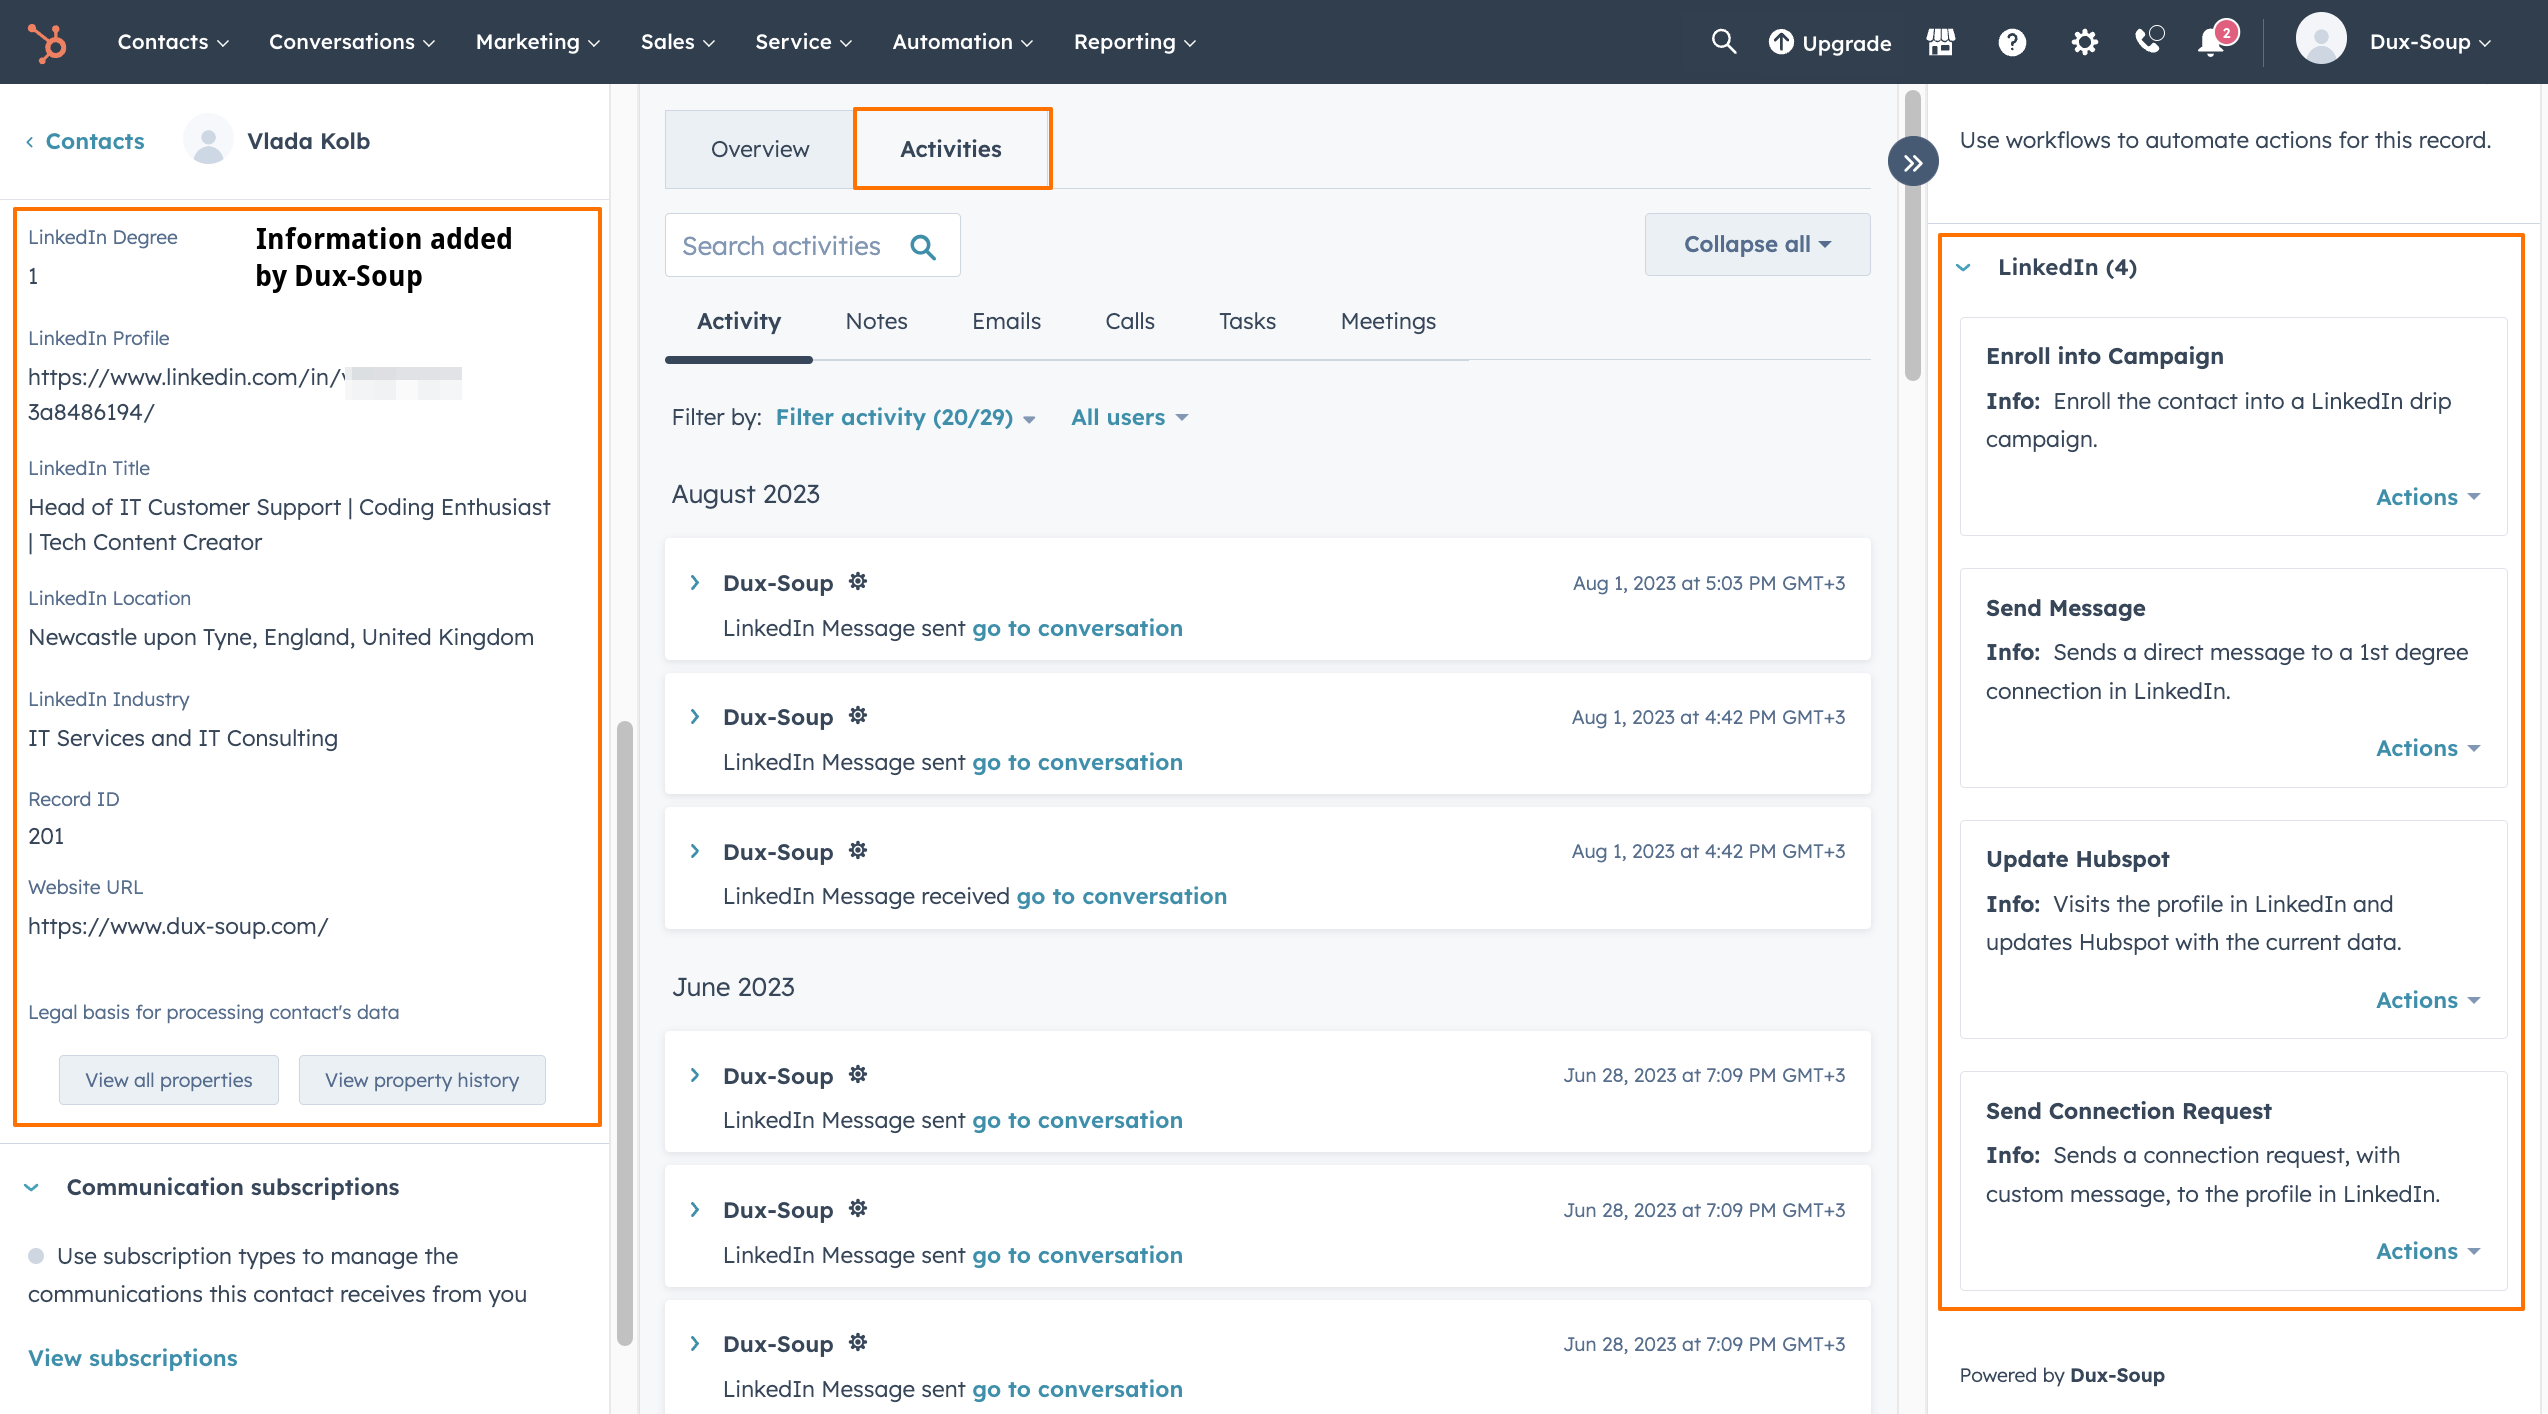
Updating contact information and automating actions directly from HubSpot
With Dux-Soup, you can run automated LinkedIn activities from your HubSpot CRM - including enrolling in campaigns, messaging, updating contact information and sending a connection request. These options are located on the right side of the Contact page:
The following (case-sensitive) message markers can be used to personalize your connection requests and direct messages.

Tip: In order to see all the information that Dux-Soup collected you will need to set up your HubSpot CRM contact properties. - Go to a contact's profile and click on the View all properties:
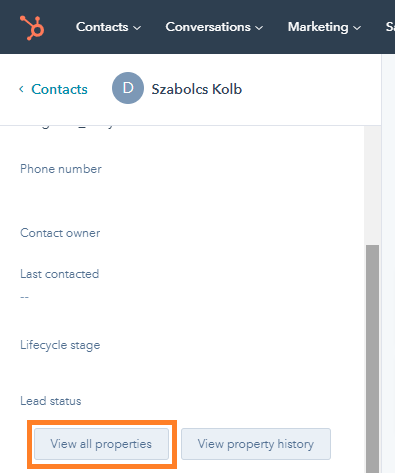
- Hide blank properties:
- Add data that you wish to see on your contacts profile:
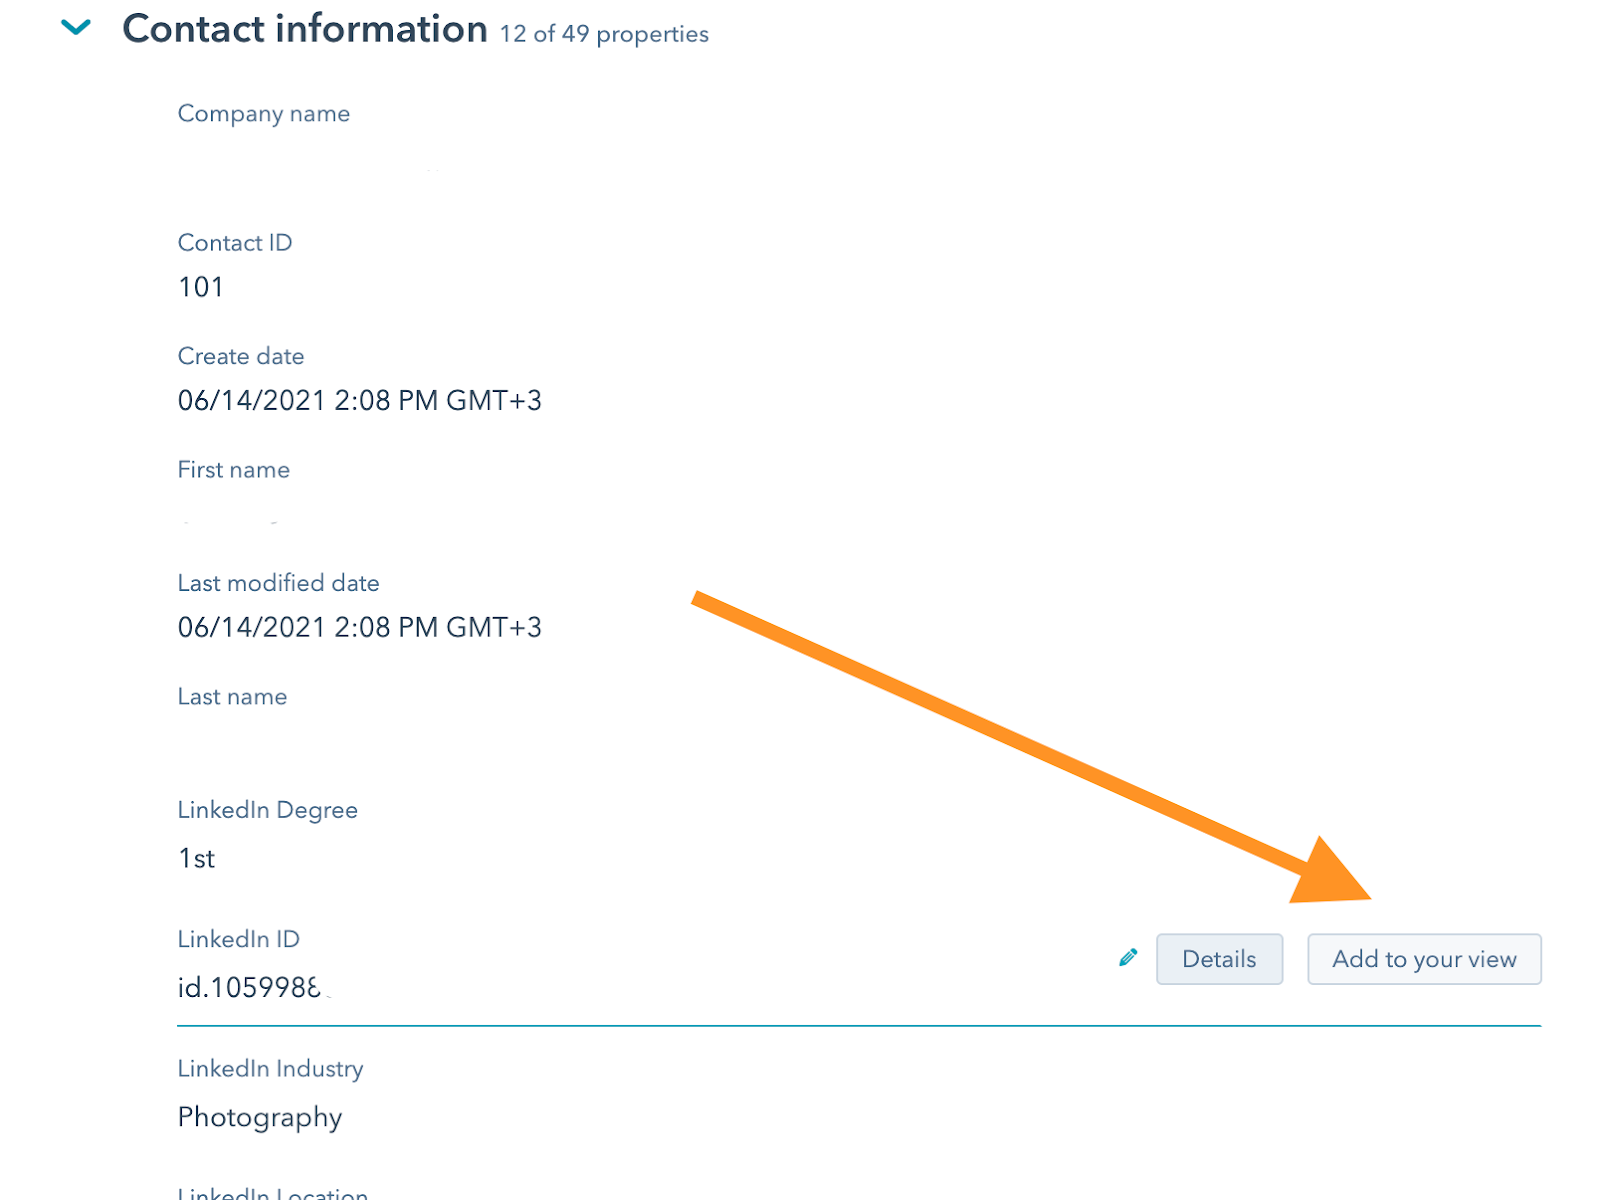
You will now see the selected information on all your contact profiles.
Watch our webinar recording to learn more
Watch the webinar recording where we demonstrate all of this and more in a live demo. Learn how to run LinkedIn lead gen activity from within HubSpot CRM, including how to:
- Send LinkedIn connection requests and messages from HubSpot
- Enroll CRM contacts into Dux-Soup campaigns
- Automate LinkedIn outreach from within HubSpot CRM
- Build and enrich your CRM data directly from LinkedIn
If you don't already have a Dux account just click here to get your FREE 14 day trial started!
Why not subscribe to our blog to hear all the latest webinars and lead generation blogs as they’re released?
If you have any further questions, don’t hesitate to contact us at info@dux-soup.com and we’ll be happy to help!
Happy Dux-ing!


